Winters are upon us. This means that we can take out our cute sweaters, woolen overcoats, and thick blazers from behind the closet and layer up in style. Other winter essentials are ear muffs, scarves, and of course beanie hats. But what if your beanie is missing a pom pom? Instead of running to your closest expensive brand store, why don’t you make one yourself? Not only will it be easy on your pocket, but you can adjust their size and colour as you fancy. In this article, we will showcase myriad techniques on how to make pom pom balls at home.
Things You Will Need
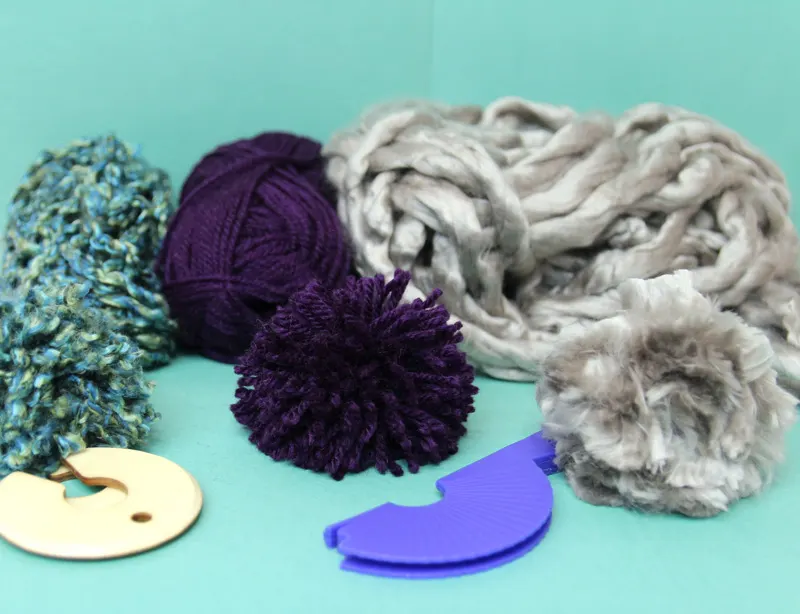
Before you start making your pom pom balls, you need to assemble the following things.
- Cloth/ Tissue Paper/ Yarn/ Wool Yarn/ Plastic
- A pair of scissors
- Cardboard, toilet paper roll, fork, or a pom pom maker
- Tape or wire
How to Make Pom Poms with Wool
This guide will teach you how to make yarn pom poms. If you are a beginner, we advise you to use wool yarn as they are much softer, thicker, and hence easily manageable. The resultant pom poms can be stitched onto your beanie hats, increasing their visual appeal. They may even be used as Christmas decorations for your home or the trees. If you are feeling adventurous, you have our blessing to use them as a keychain too.
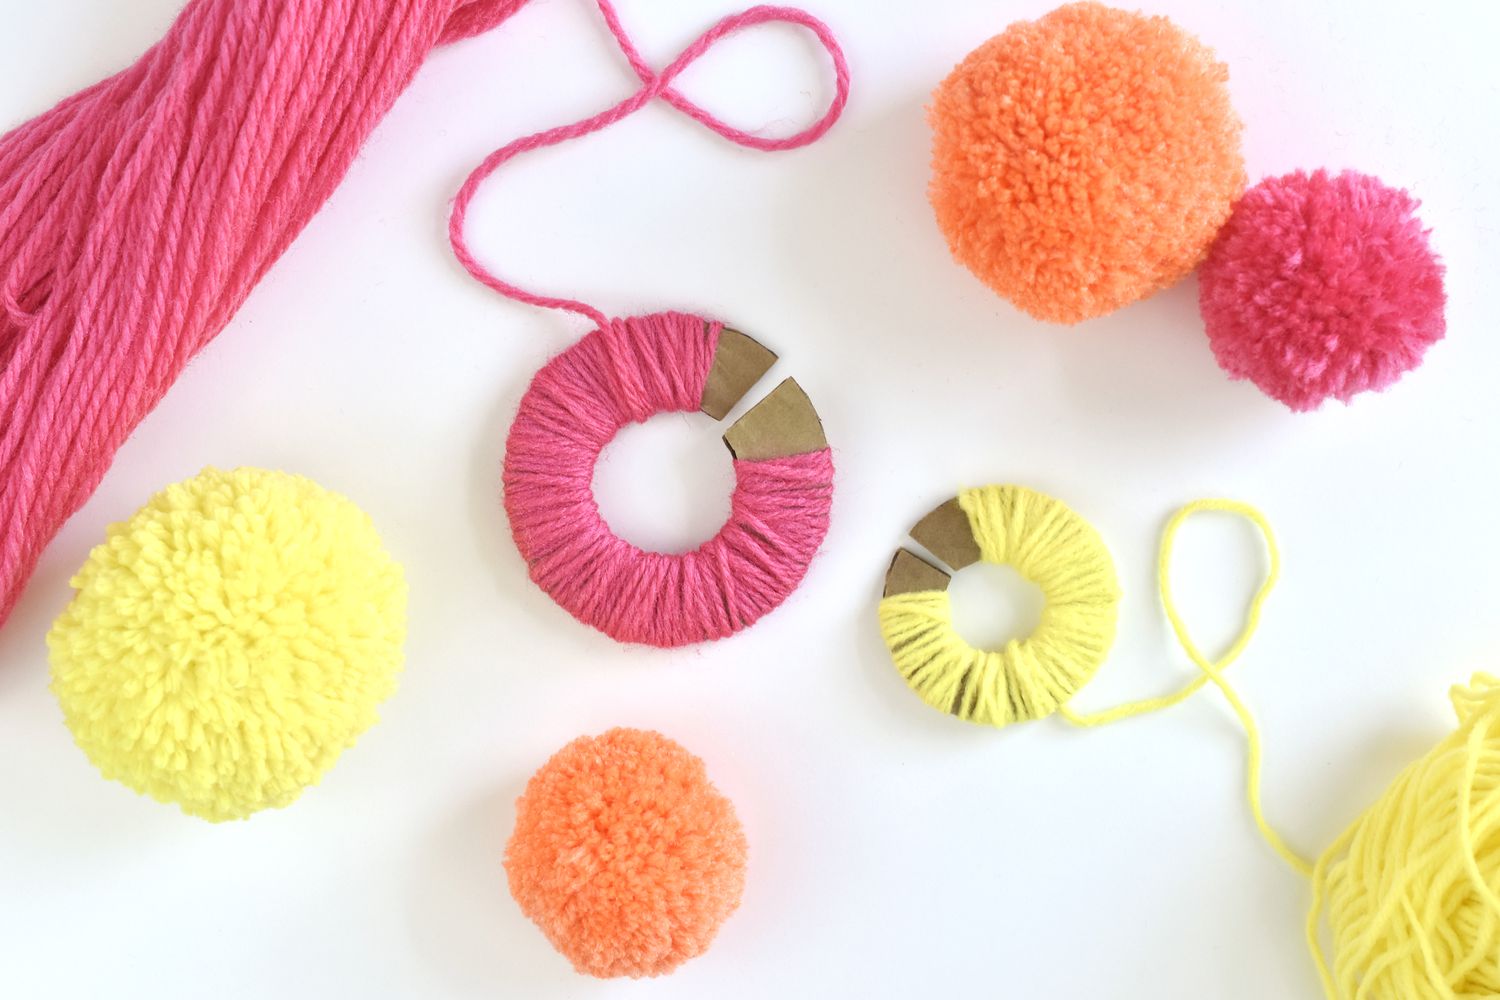
Here’s how to make a pom pom for a hat. Just follow the given steps.
- If you have a pom pom maker, a cardboard roll, or a fork, immediately move on to the next step. If not, cut out two cardboard circles, with a keyhole-shaped hole in them. Align both of them, eclipsing each other. Remember, the bigger the circle, the bigger the size of the pom pom balls
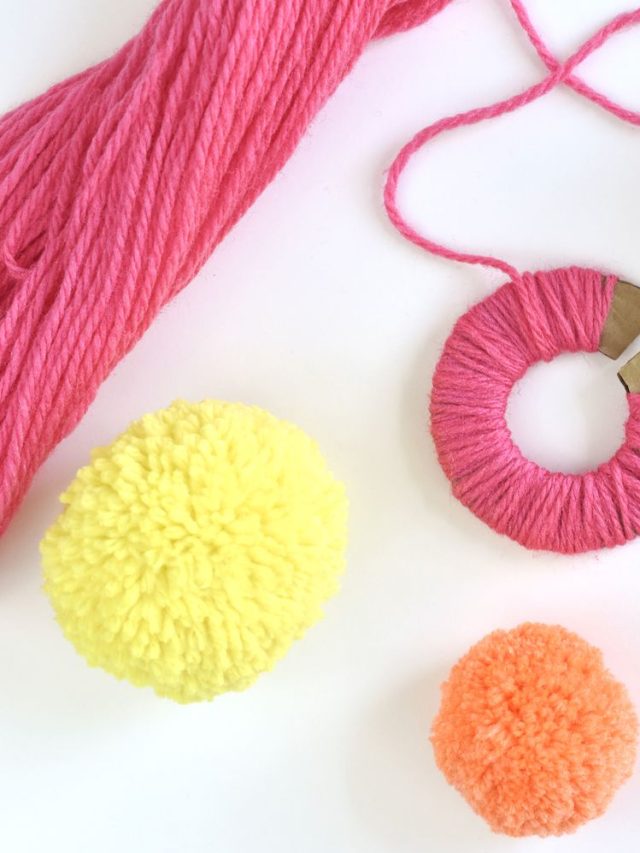
- Roll the wool yarn on the entirety of the cardboard surface, roll, fork, or the pom pom maker. At this stage, you may add multi-coloured yarn threads if you wish. You will be left with a roll of yarn
- Bring two sides of the yarn roll together and tie them with another piece of thread.
- Cut the outer thread of the yarn, so that you are left with several yarn pieces tied together by a thread.
- Trim the pom pom. Ensure that they are of the same length.
Now you may hang these pom pom balls on another thread or a fishing wire. Roll it around your Christmas trees, the fairy lights, or your mantlepiece. These DIY pom pom balls are sure to brighten any corner of your house. If you were in desperate need of fixing your beanie or ornament, you can sew them on too.
How to Make Tissue Paper Pom Poms
Pom Pom Balls aren’t exclusively made of yarn, but can also be made of paper. If you have ever visited a store which sells party decorations, you will find pom poms made out of tissue paper or coloured plastic. These make great decorations and can be hung from the sealing. But why buy it when you can make it? Here is an easy guide on how to make paper pom poms.
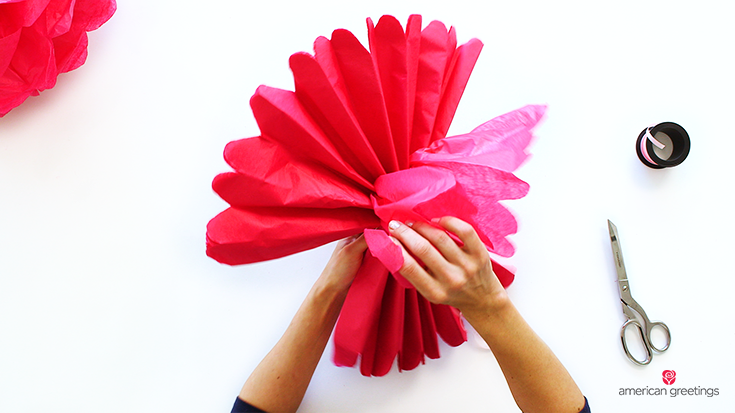
- Gather numerous sheets of paper. If they are coloured, they will look more appealing.
- Fold them lengthwise like an accordion.
- If you wish to use them as decorations, you may cut the end in different shapes (zigzag, rounded, or other patterns)
- Tie a piece of wire in the middle.
- Now fluff out the pieces.
Tie the wire to a string and sling them from the ceiling. They will undoubtedly instil a sense of festivity and celebration in your rooms.
How to Make Cheerleading Pom Poms
What are the defining attributes of a cheerleader? You guessed it right – the pom poms. We do agree that a good cheer routine and dancing abilities are important characteristics as well, but have you ever seen an infectious cheerleader without a pom pom? Cheerleading pom poms are almost made of plastic and glitter and can be bought at any local toy store. But you can save up on expensive cheerleading gear if you follow the given steps on how to make cheerleading pom poms.
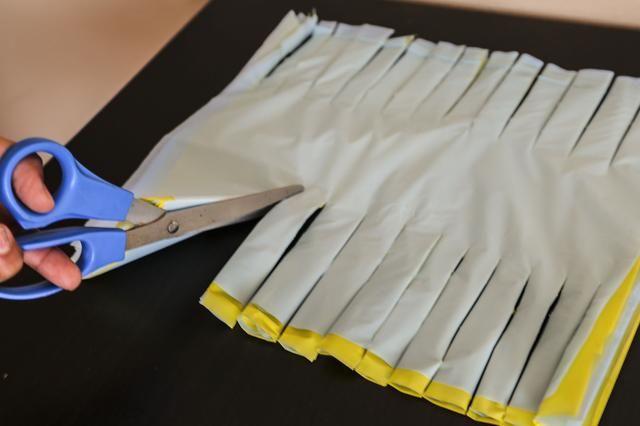
- Assemble several plastic sheets (choose any colours of your liking) and stack them one on top of the other to create a pile.
- With a marker, draw a strip at the centre. Once the process is complete the strip will act as a handle, therefore, adjust the width of the strip according to your convenience.
- Cut the fringes from either end. You may alter the width of these fringes. Be careful of the strip, making sure that the cuts do not invade it.
- Gather the plastic stacks at the strip. Tie a piece of fishing wire or tape on it.
- Fluff out the strips, making sure that no two pieces stick to each other.
And there you have it, an easy guide on how to make cheerleading pom poms.
Image Courtesy – Moms and Crafters
Recycle and Upcycle Daily Plastic Trash into Plastic Plant Pots