
If you are one of those people who looks at their closets and finds that they have nothing to wear, this guide on how to tie dye will revolutionize your life. Even though the colours and their intensity can be customized, modern tie dye gives a bold appeal to your clothes. These bold patterns and exquisite designs will pair up well with the fashion-forward modern individual. So what are you waiting for, tie and dye your plain old solid white T shirt right away?
What is Tie Dye?
Tie Dye refers to any process which utilizes the resist dyeing technique. A tie dye process always involves folding the cloth, tying it with rubber bands, and dyeing it. But why is it called ‘resist’? This is because it prevents the dye from completely seeping into the cloth. This is how you get myriad patterns or ombre effects on your clothes. Tie-dye has been around for centuries. The earliest evidence found of this ancient technique dates back to Peru in 500-810 AD. Almost every country has regional variations of tie dye tie technique. Japanese shibori, Indian Bandhani, Nigerian adire, Indonesian batik, and more stand as a testament to the popularity of this art form.
It must be interesting to note that the modern-day tie dye is quite different from the primordial one. Just like all good things, the craze for tie dye subsided. The onset of the 21st century rejuvenated this fad, albeit as a hobby and an art form not as a commercial venture.
Things You Need For A Successful Tie Dye Process
Tie-dye is a fun process but extremely messy. Therefore, make sure to cover your entire floor. We would even advise you to take it outside of your house. Here are all the essentials you will need.
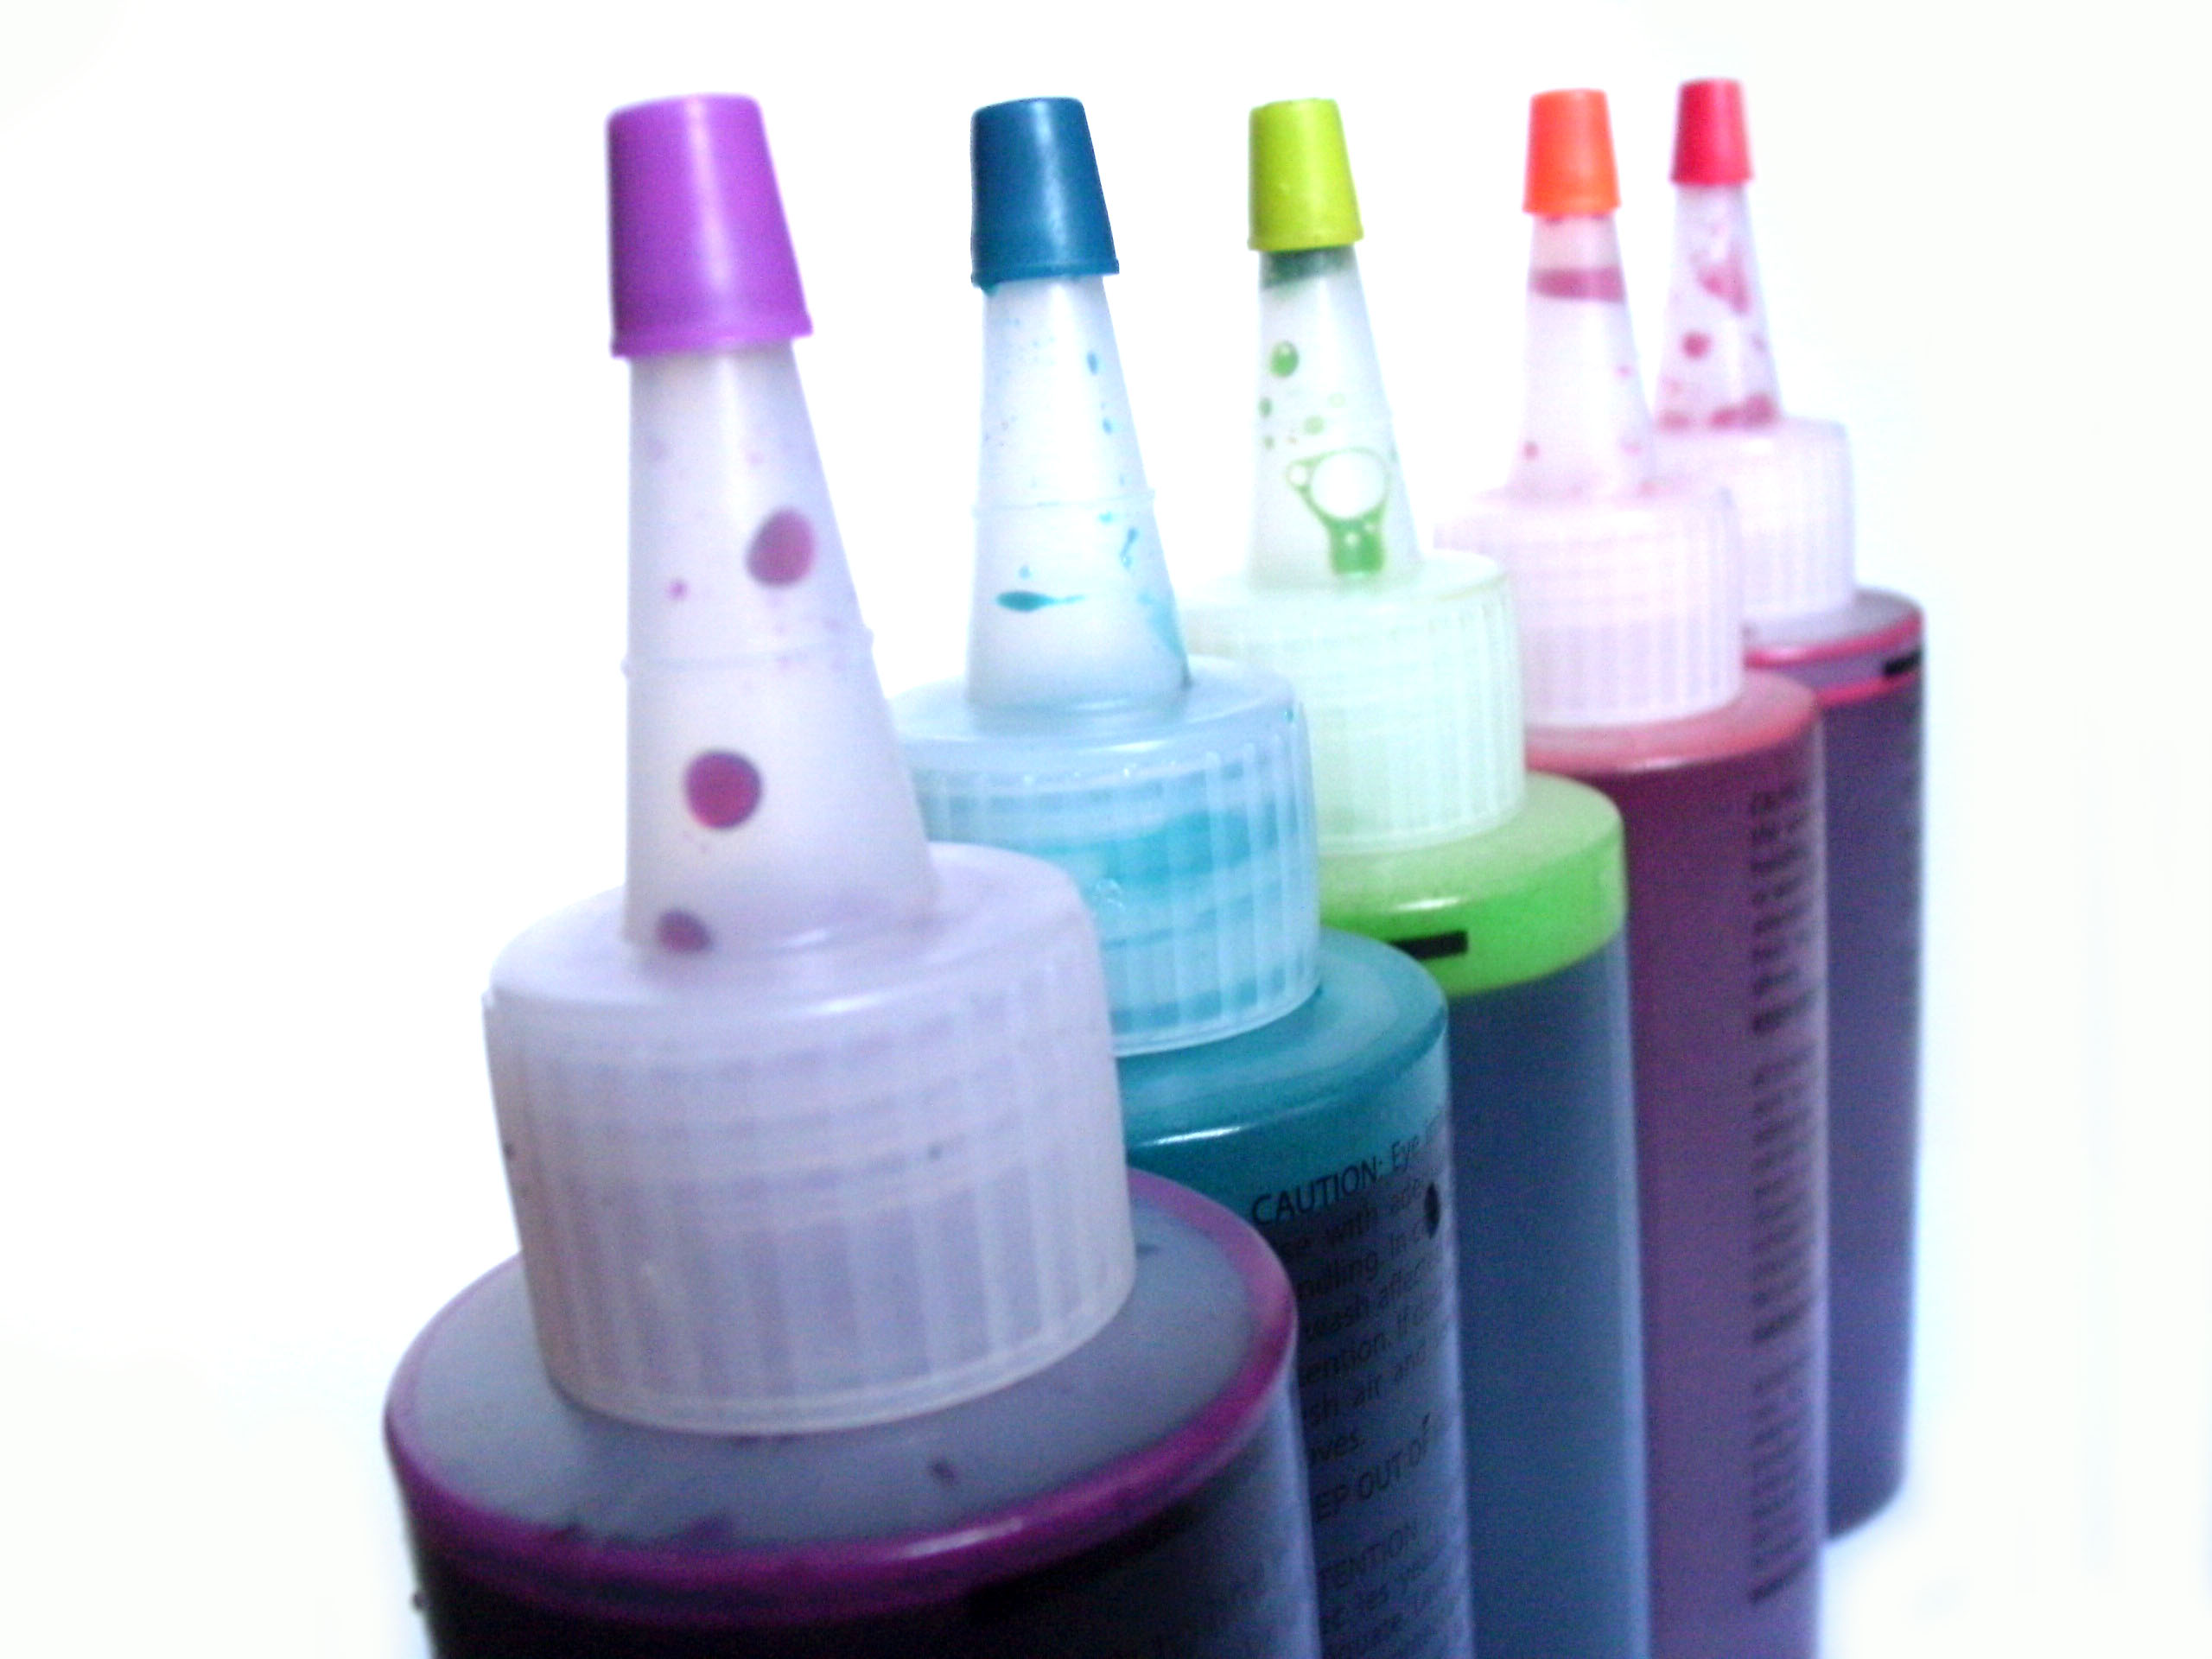
- Fiber-reactive dye
- Clothes Duh! (white would be the best choice as the colours will pop better and give you a bold look)
- Extra strong rubber bands. Tighter rubber bands allow for more white spaces in the finished product as they prevent the colours from seeping into the fabric.
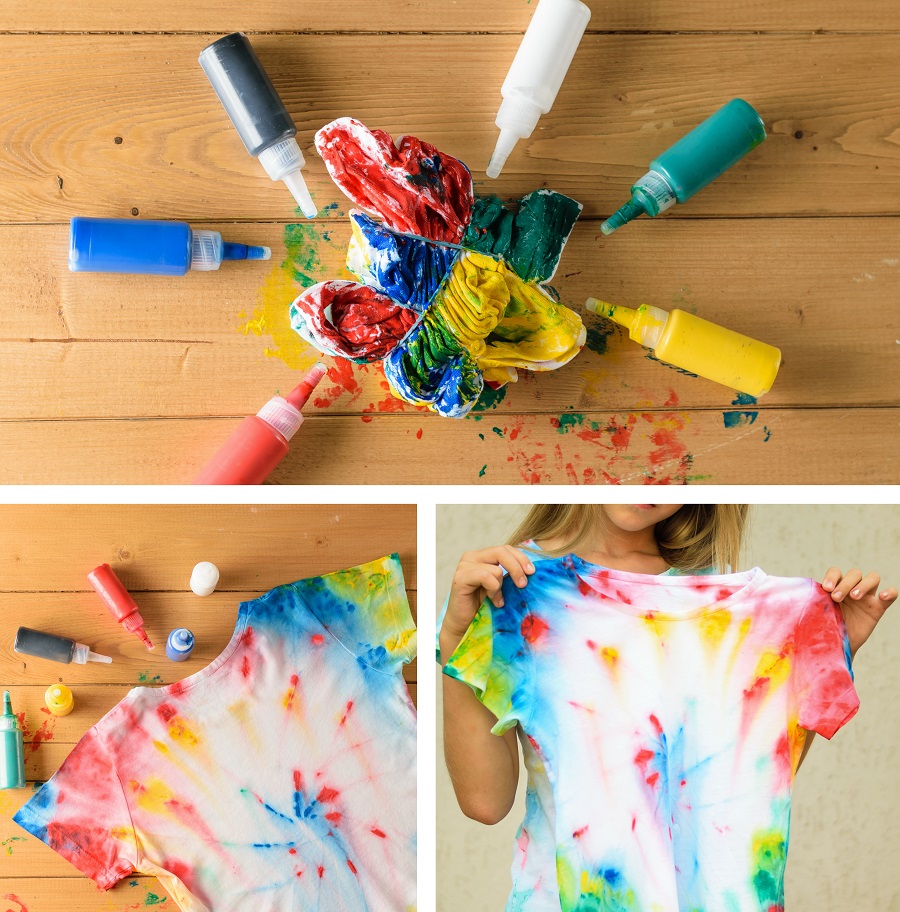
- Spritzing bottles/ squeeze bottles
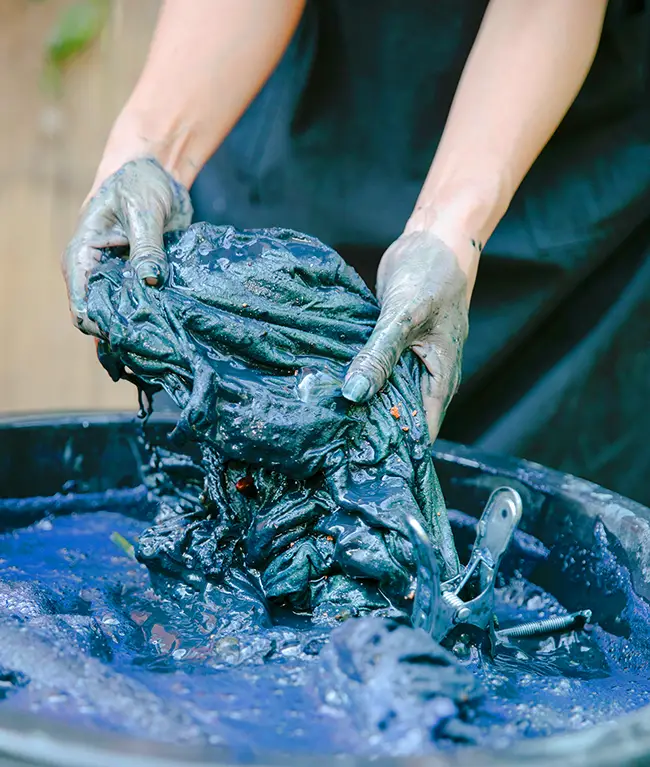
- Protective Gloves
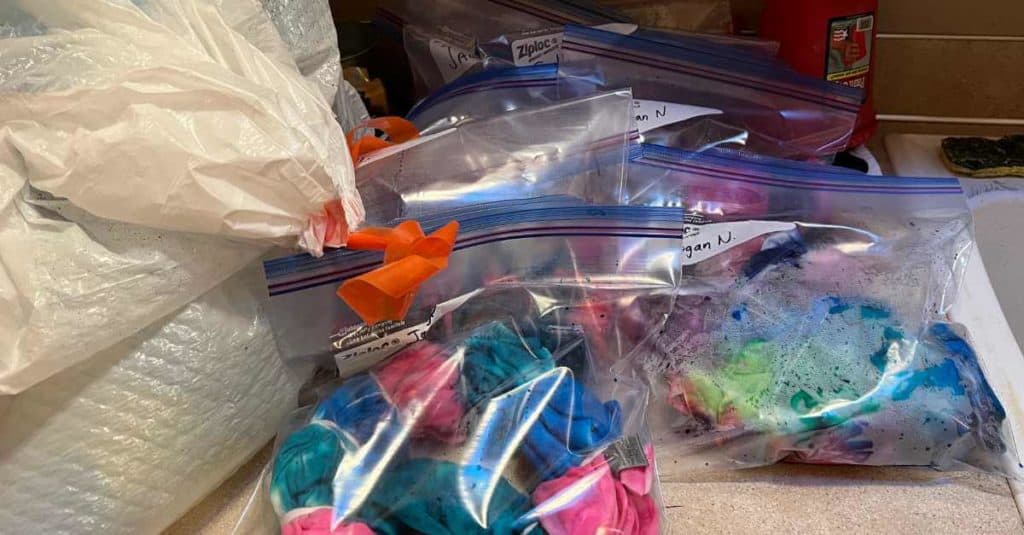
- Ziplock bag
Now that you have assembled your ingredients, it’s time to realize your vision.
STEP 1: Preparing your Dye
The dye may come in either a powder form or a liquid form. These are heavily concentrated, so you will have to mix them in the water. Most tie dyes come with package instructions so you may want to follow them. If they have no specified directive, keep mixing till you reach your desired colours. You can tie dye in a bucket (only if you want an ombre effect). But if you want a multi-coloured garment, you may want to transfer these dye solutions into a spritzing bottle. This will give you greater control of the colour, assisting you in creating defined patterns.
STEP 2: How to Fold A Shirt For Tie Dye
Even though the tie-dye process is quite simple, you can make diverse designs and patterns. In the end, it all comes down to folding your garment the right way. Given below is a guide on how to roll a shirt for tie dye to make specific patterns. Ensure that your dress is damp and not soaking wet or the concentration of the dye will be lost.
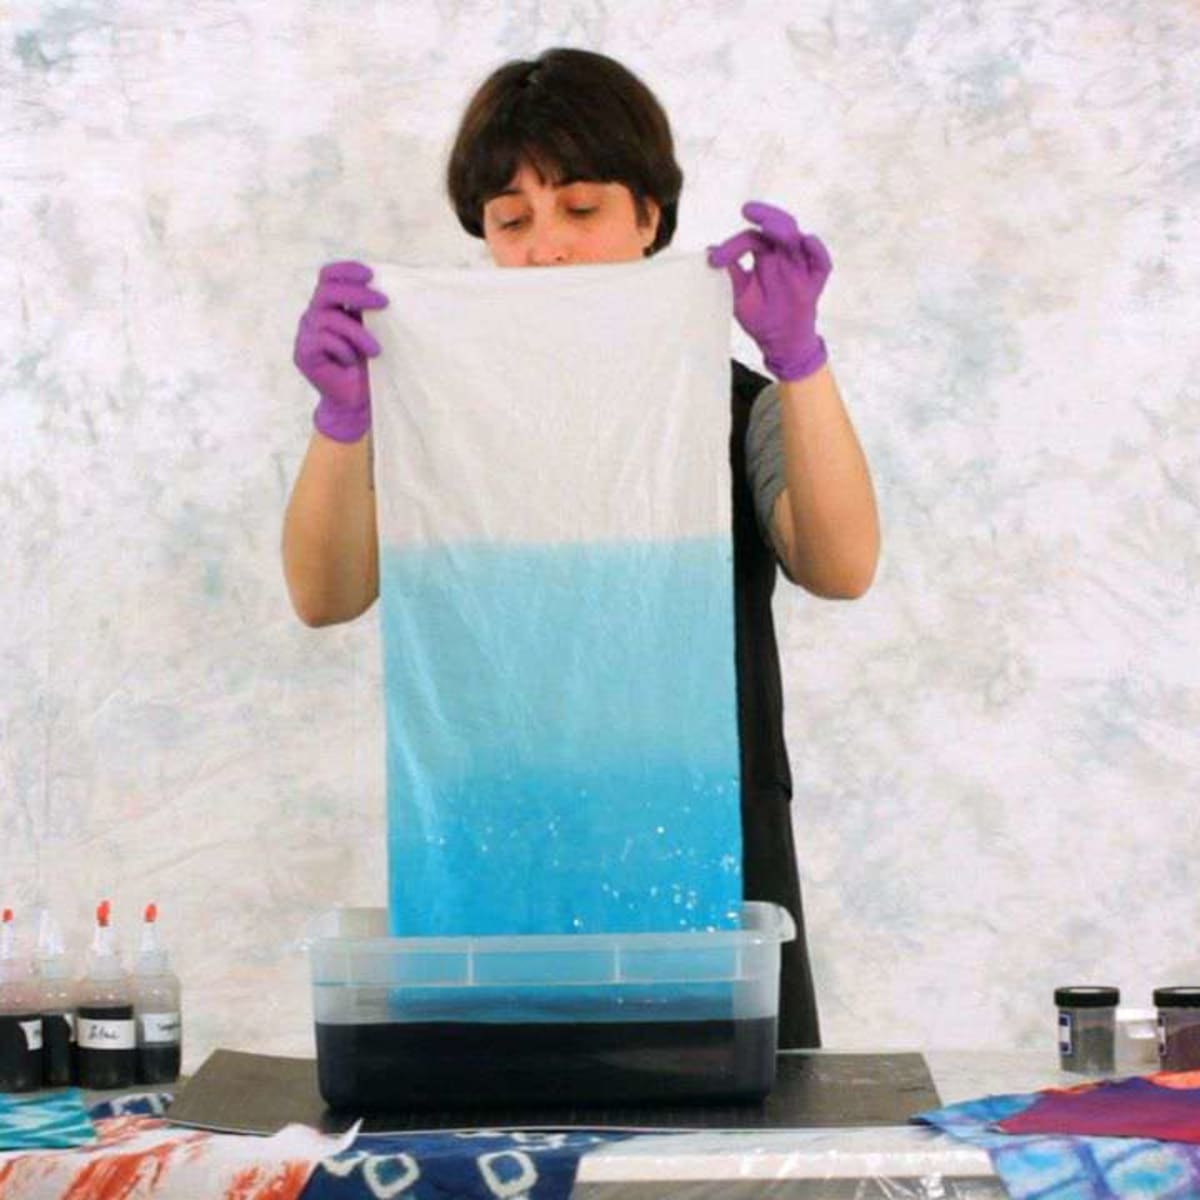
Ombre/ Gradient Effect
If you are going for an ombre effect (remember that you can only do so with one colour), you do not need folding. You simply need to dip the cloth in the bucket. Section your garment. Now dip the bottom part in the solution again for a stronger colour. Repeat the process till you are satisfied.
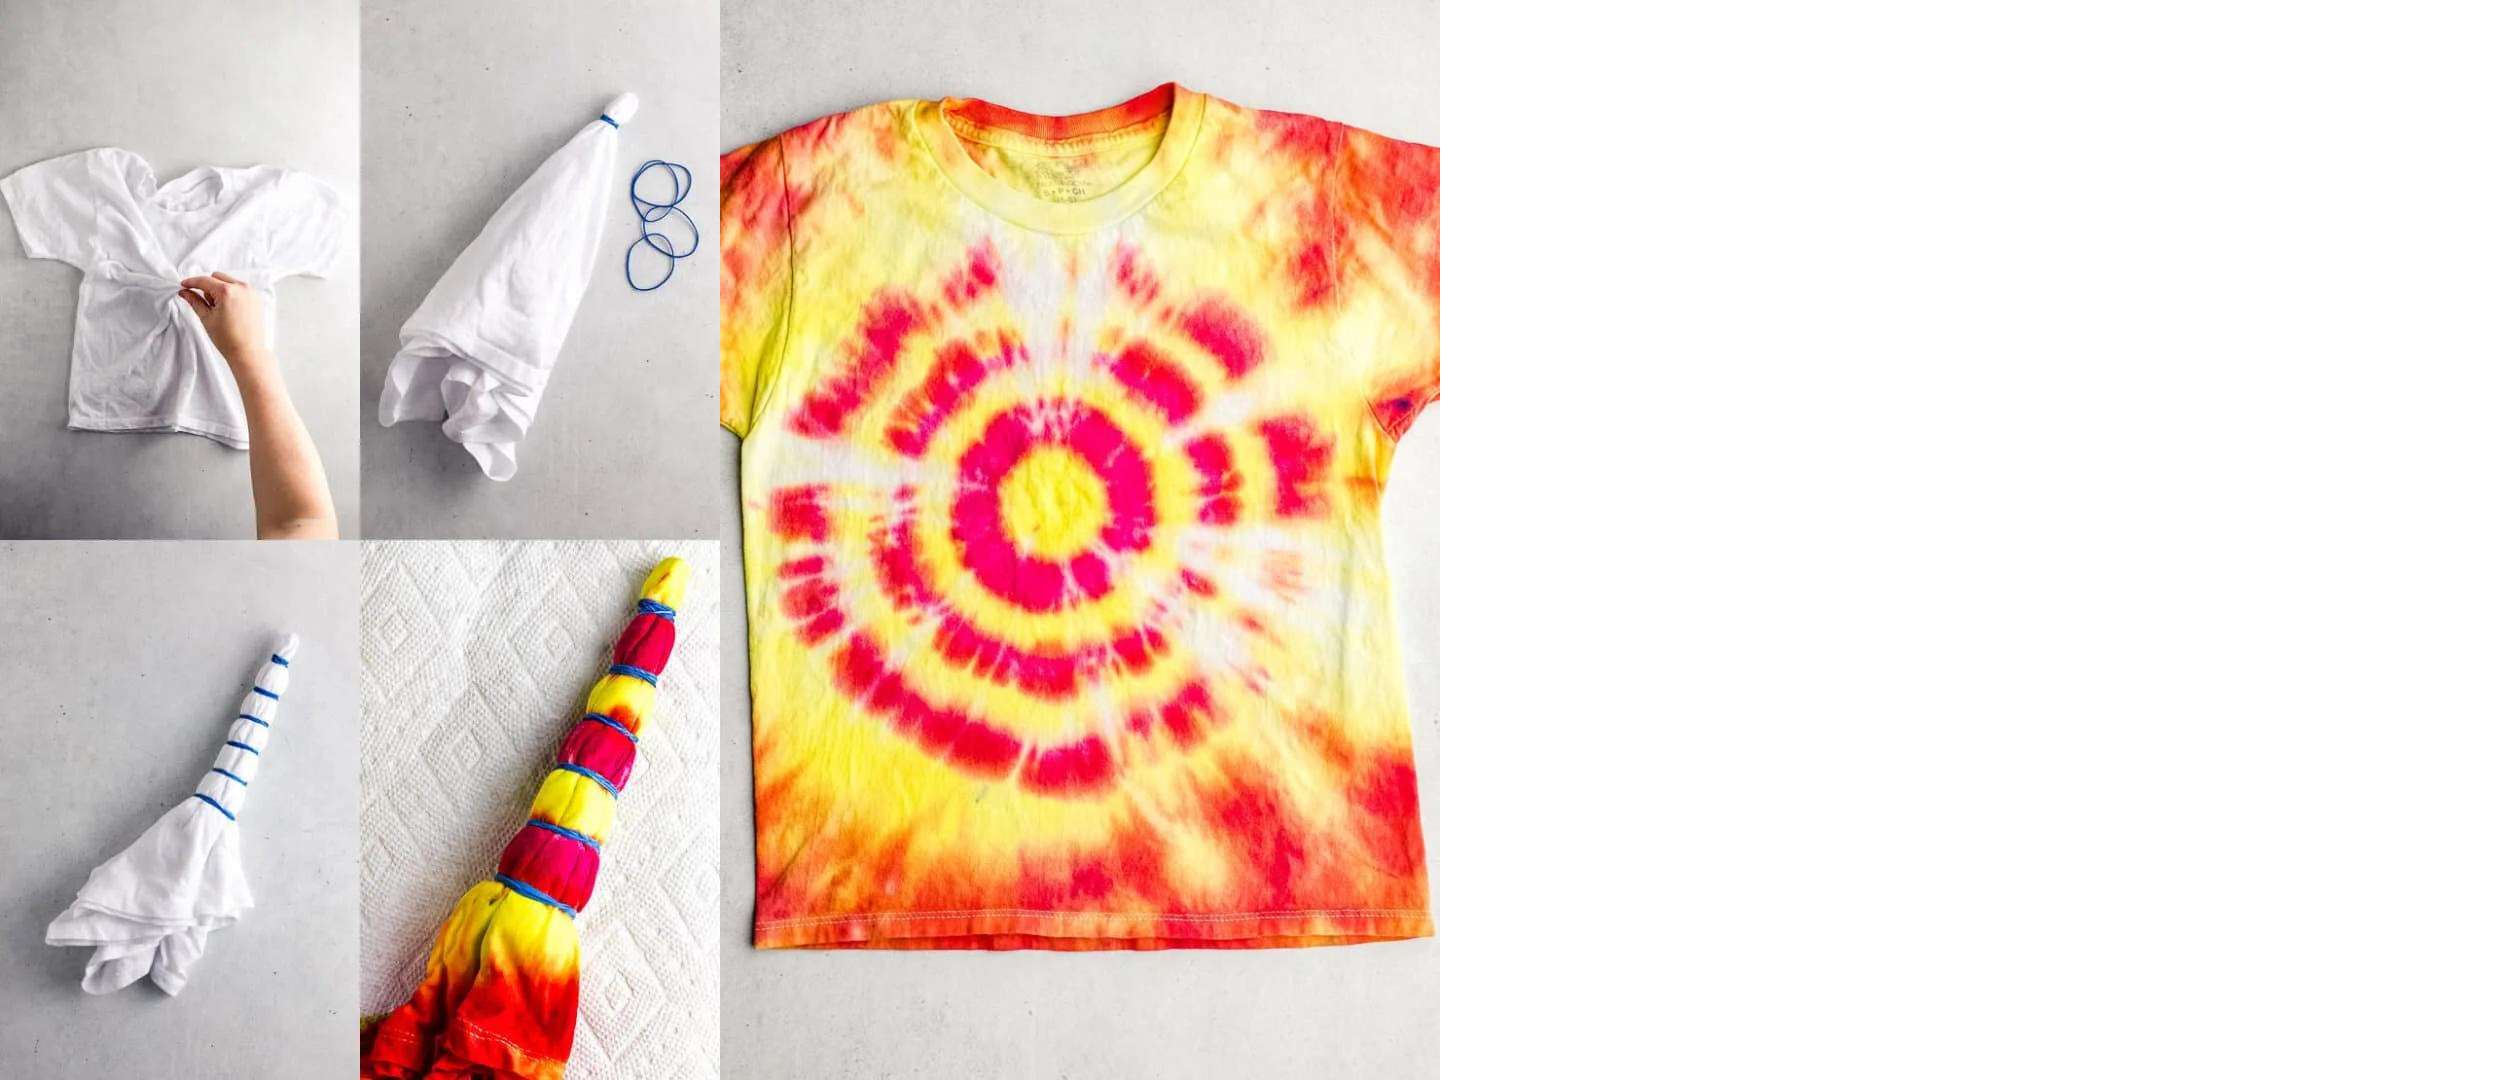
Bull’s Eye Effect
If you are going to your local pub for a game of darts, internalize the thought and make a tie-dye shirt with a bull’s eye effect. Lay your shirt flat. Find the centre and pinch it, pulling it upwards. Nearly 1-2 inches in, section your shirt using rubber bands. Keep repeating this process, bifurcating your shirt with the rubber bands placed 1 inch apart until your shirt looks like a stretched-out stick. Spritz different coloured dyes on these sections.
Nebula/ Spiral/ Swirl Effect
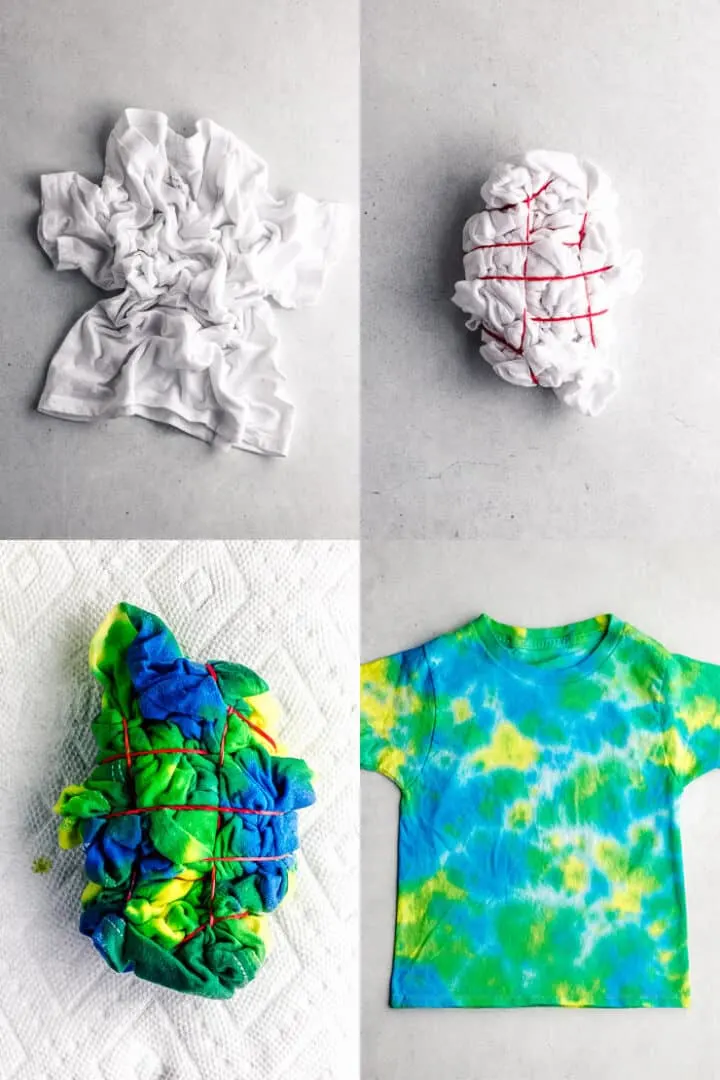
With a nebula effect, you will become the star of the show. Lay your shirt down flat. Now at the centre, rotate and crumple your shirt till it forms into a tiny disc. Wrap the rubber bands around the garment. The more rubber bands you put in, the more sections there will be. Spritz colour on each section. If you only have two dyes at hand, we advise you to alternate the colours.

Polka Dot Effect
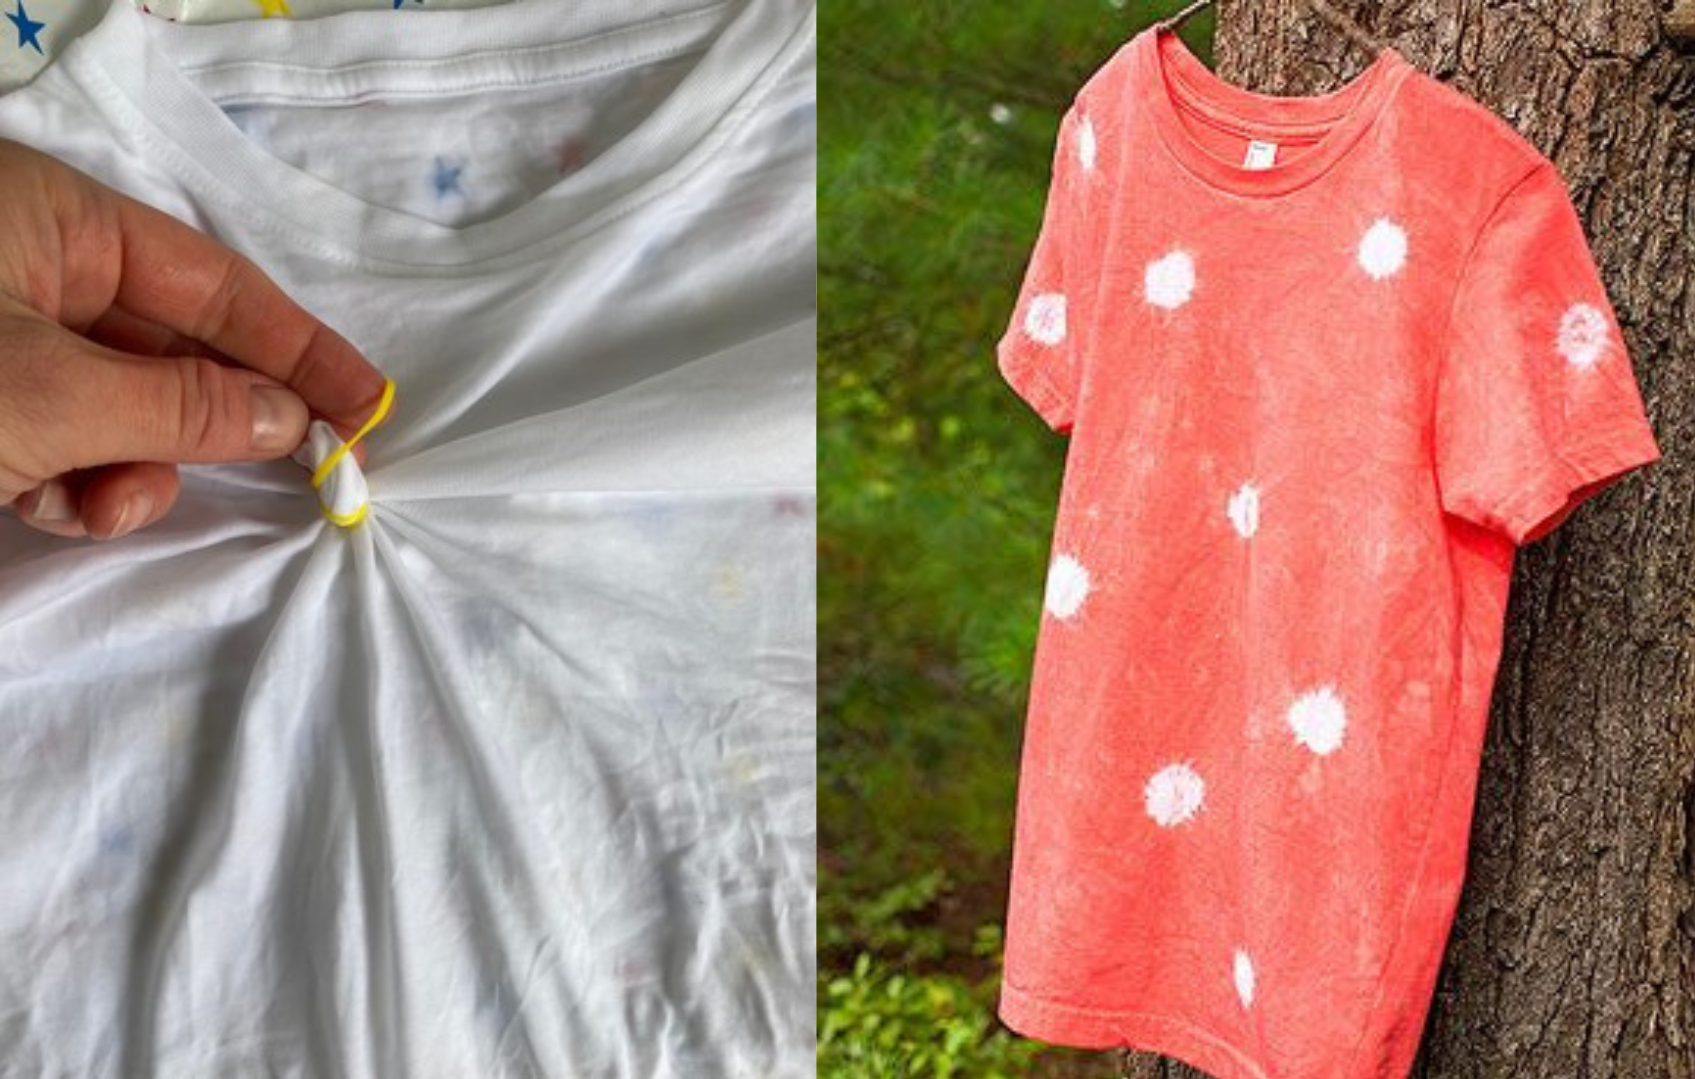
You may even make a polka dot design with tie dye. Grab a handful of beads or beans. Now carefully place them inside the shirt and wrap a piece of plastic over them with the rubber band. The process might be laborious but the final tie-dye shirt is definitely worth it. Spritz the colours. The plastic will ensure that the colour does not penetrate the balls, giving you a pattern of white polka dots.
Abstract Effect
If you wish to engineer your shirt into an artwork rivalling Jackson Pollock, you need to opt for this effect. Simply scrunch up your shirt any way you like. Tie rubber bands around it, you guessed it, any way you like. Now spritz the sections.
Heart Effect
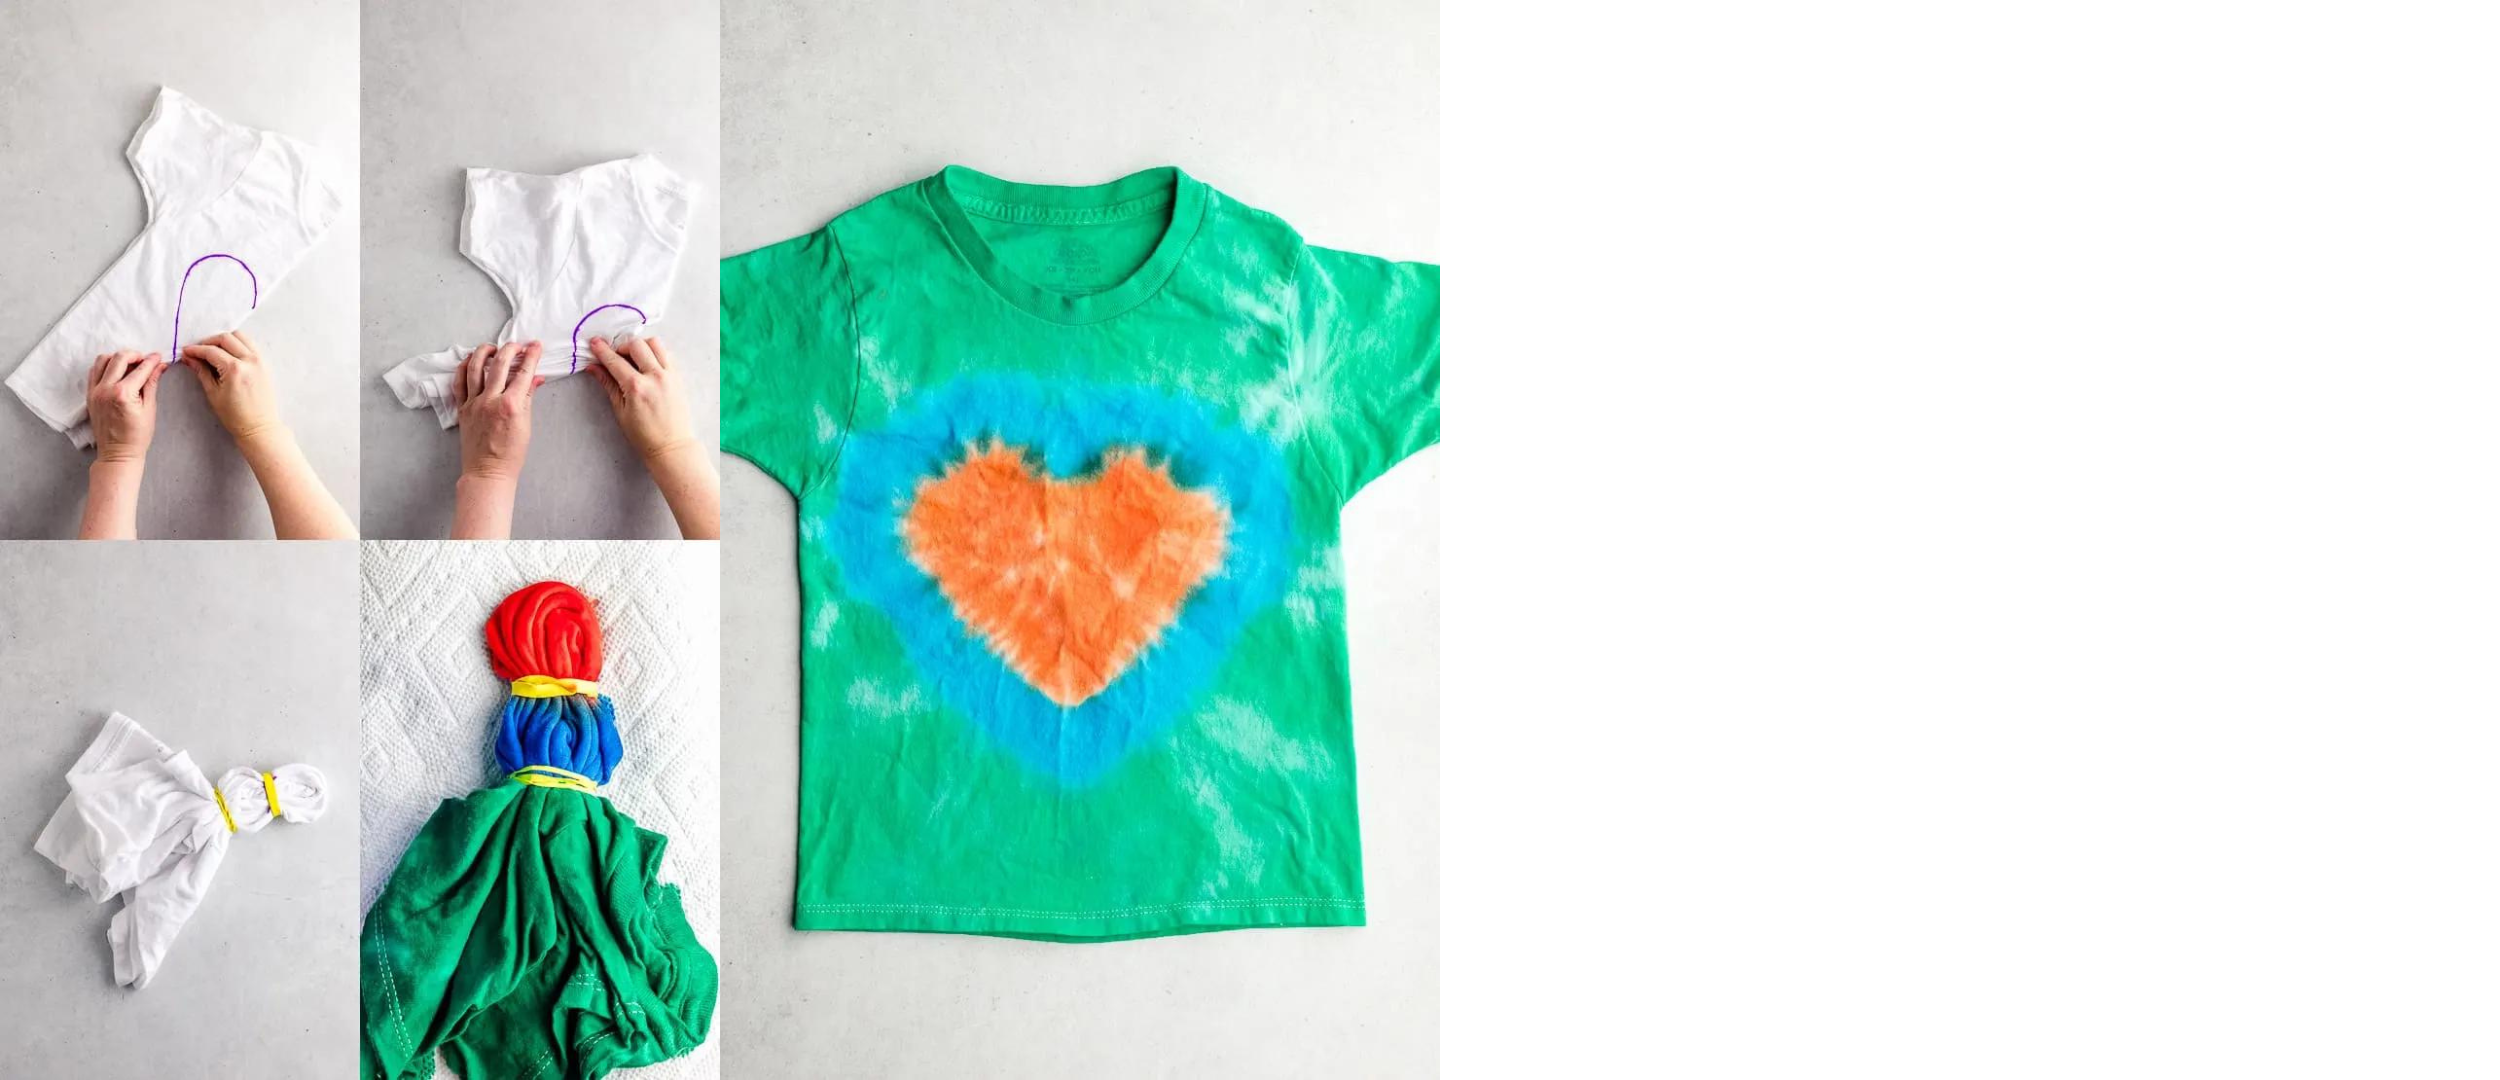
Couple Goals? You can be the next power couple with a little bit of DIY. Fold your T-shirt in half. Now draw a heart shape (use a thread, not a paint marker). Carefully fold the T-shirt so that the heart shape is accommodated in a complete section. You may make several sections to replicate a beating heart ?. Spritz the sections with the dye solutions.
Kaleidoscope/ Mandala Effect
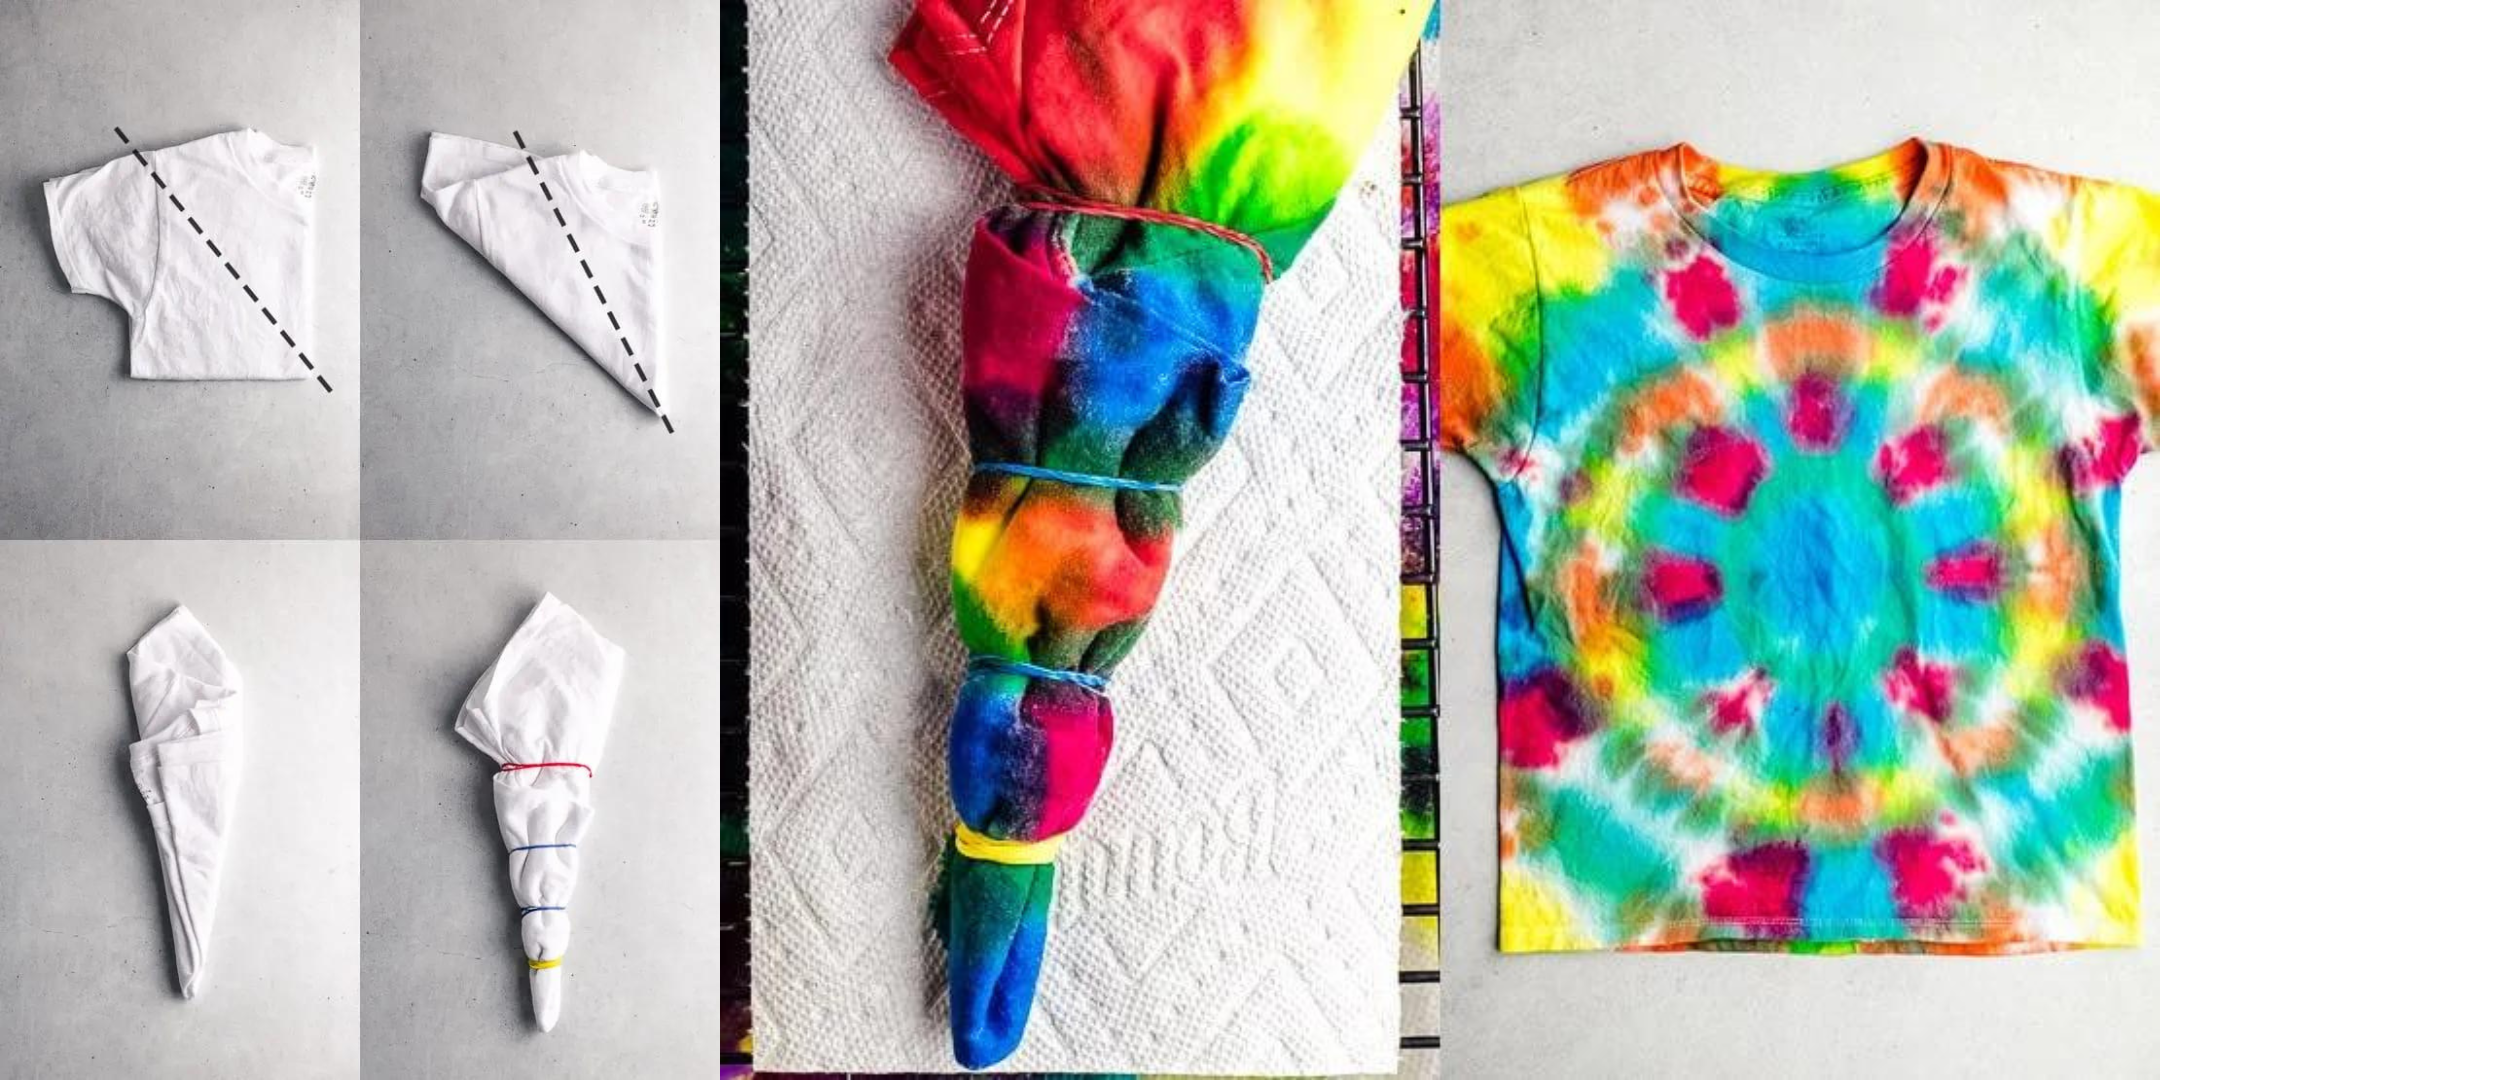
Fold your shirt twice so it becomes a quarter of its original. Now make diagonal folds till it becomes a sixteenth of its original. Secure with rubber bands and spritz the dye solution on the sections.
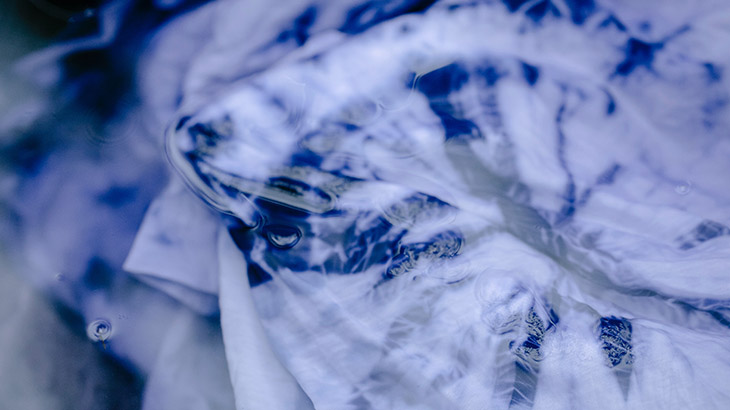
STEP 3: Rest and Let It Rest
Now that you have successfully dyed your garments, keep them in a ziploc bag. Since we are working with fabric reactive dye, a ziplock bag becomes a necessity. It will ensure that the cloth remains wet and warm. These are the two important conditions for the clothes’ fibres to entirely soak up the dye. 3-4 hours shall do the trick!
STEP 4: How to Wash Tie Dye
Once your tie-dye project is complete, you need to rinse it. For the first wash, keep the rubber bands intact and wash with cold water. Now unfurl the cloth and rinse with lukewarm water. When the water runs clear, you can wash them in the washing machine with any light detergent (emphasis on light). A harsher detergent might let the colours bleed out. Now, your tie dye is ready to wear. For the first 5-6 loads, wash the tie-dye garment separately. After that, you do not have to segregate your laundry.

STEP 5: How to Get Tie Dye Off Skin
The reason why protective gloves are essential to the entire tie-dye process is because they protect your skin. Tie Dye colours are not as irritable as other dyes but you will still have to wipe them off. If your hands have only been tainted for a couple of minutes, run your hands under lukewarm water and wash with regular soap or dishwasher soap. If that doesn’t help, you may want to try an array of readily available products – vinegar, facial exfoliants, baking soda, nail polish remover, olive oil, or coconut oil.
If these don’t help you either, you may want to invest in tie-dye-removing wipes. Yes. They exist.
Image Courtesy – Hunar Online Courses