


At the elementary level, drawing meant making shapes and colouring them. Whether it was trees, birds, or clouds, drawing was a fun activity. Only when we grow up do we come to respect the discipline of fine arts. We learn about what makes a composition attractive and learn about the 7 elements of art and design. Even something as basic as shading (which we often confuse with smudging) has so many techniques which need to be studied thoroughly. So today, we discuss everything that you have ever wanted to know about hatching drawing.

The Use of Hatching Drawing
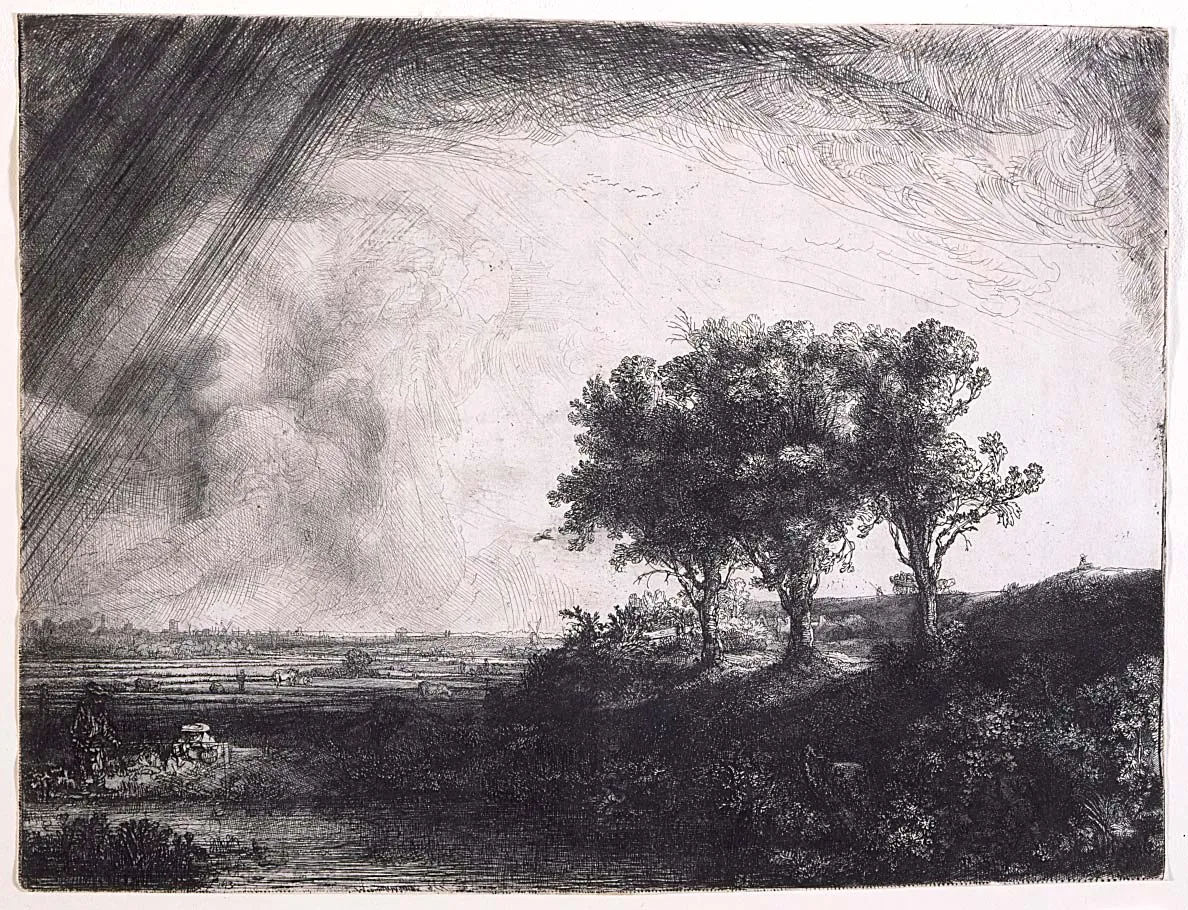
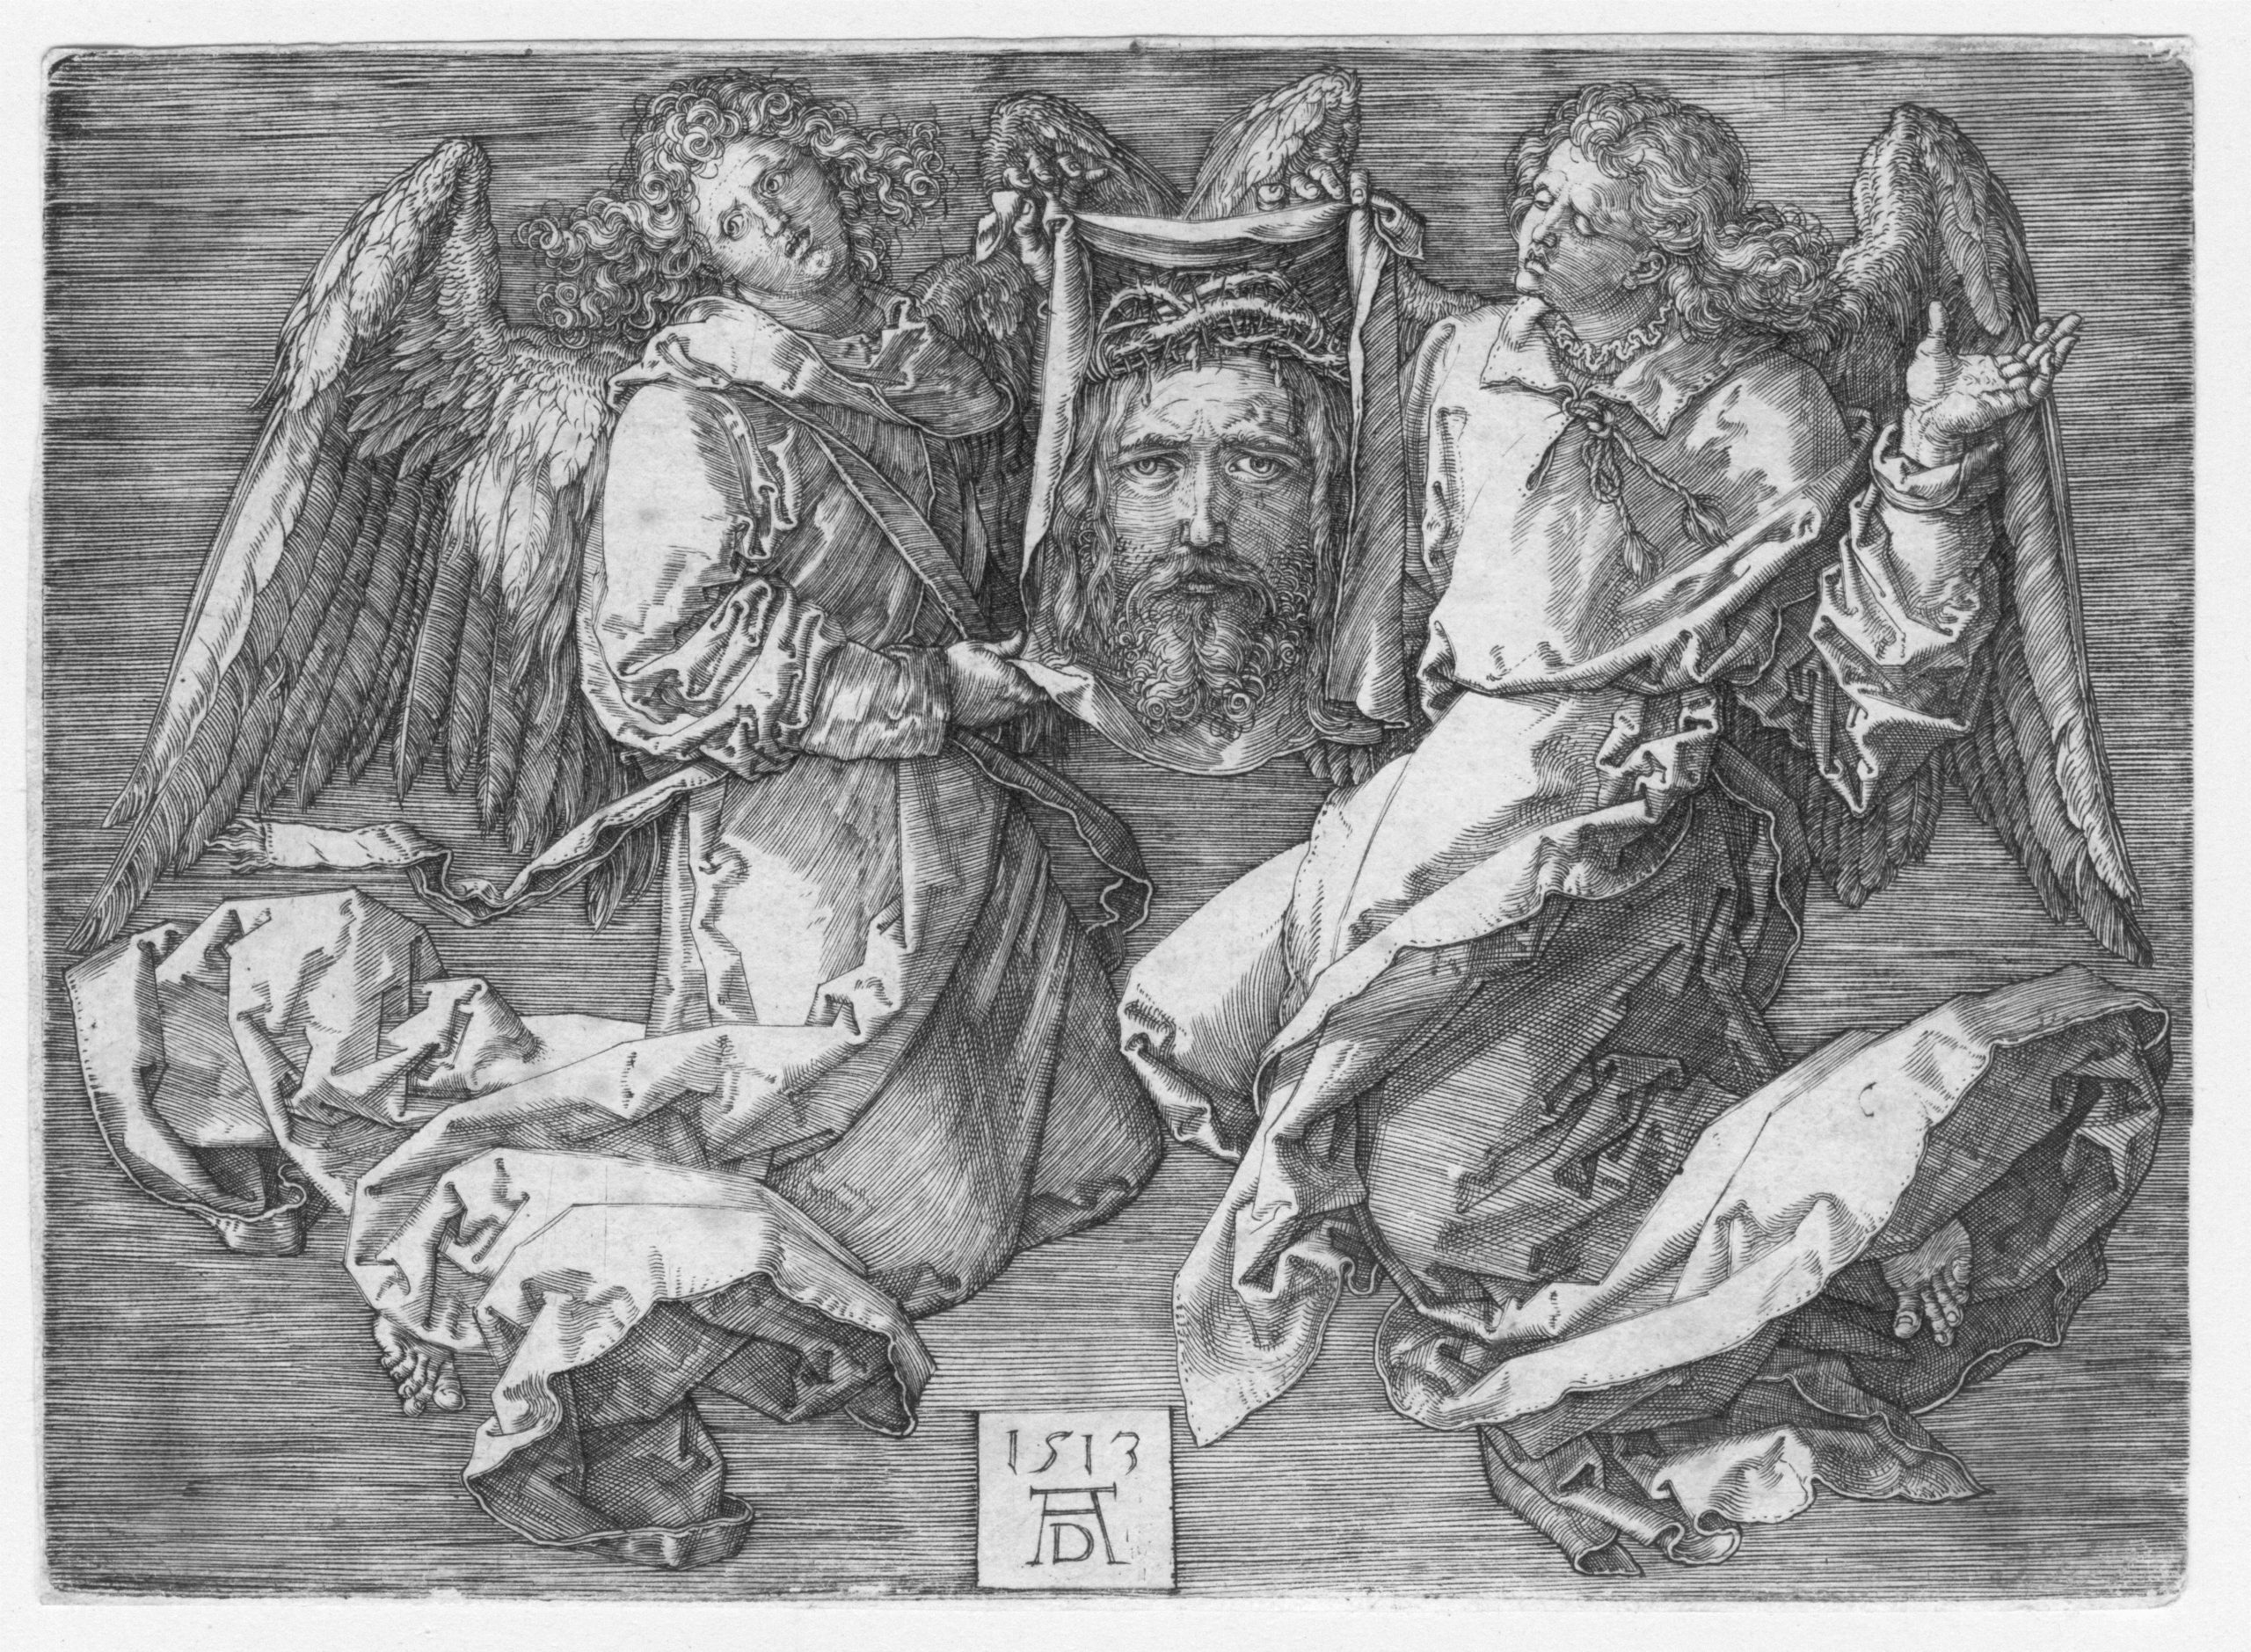
It is believed that hatching originated in the Middle Ages. It was further worked upon to devise cross-hatching which was perfected by the fifteenth century. Master ES and Martin Schongauer perfected the cross hatching technique in engraving, while Erhard Reuwich and Michael Wolgemut became the hatching pioneers in woodcut. Bringing together both worlds was Albrecht Dürer.
Believe it or not, hatching drawing techniques aren’t only reserved for draughtsmen, engravers, or artists. Even engineers make hatching line in engineering drawings. Many organisations have standardised the hatching drawing of the materials. Architects too make extensive use of easy cross hatching drawing techniques to denote textures in architectural sketching. While you may use hatching for pencil drawings, cross hatching drawing methods are most often used with a medium which cannot be blended, such as pen and ink.
Hatching Drawing Technique
Hatching drawings use parallel lines and play with their length, proximity, and number to define shade, tone, or texture. When these parallel lines are intersected with other parallel lines (often perpendicular), it forms a cross hatching drawing. Hatching drawing techniques can be applied to textile design, printmaking, engraving, woodcuts, and etching.
The number of lines, thickness, and closeness will define the brightness of the desired region, which in turn lends to the overall image. Both hatching and cross hatching drawing techniques render volume to the form and emphasize it. The increase in the lines, their thickness, and proximity will lead to a darker shaded area. You may even create contrast by juxtaposing two forms. However, both of these forms must have lines warping in different directions.
Types of Hatching Drawings
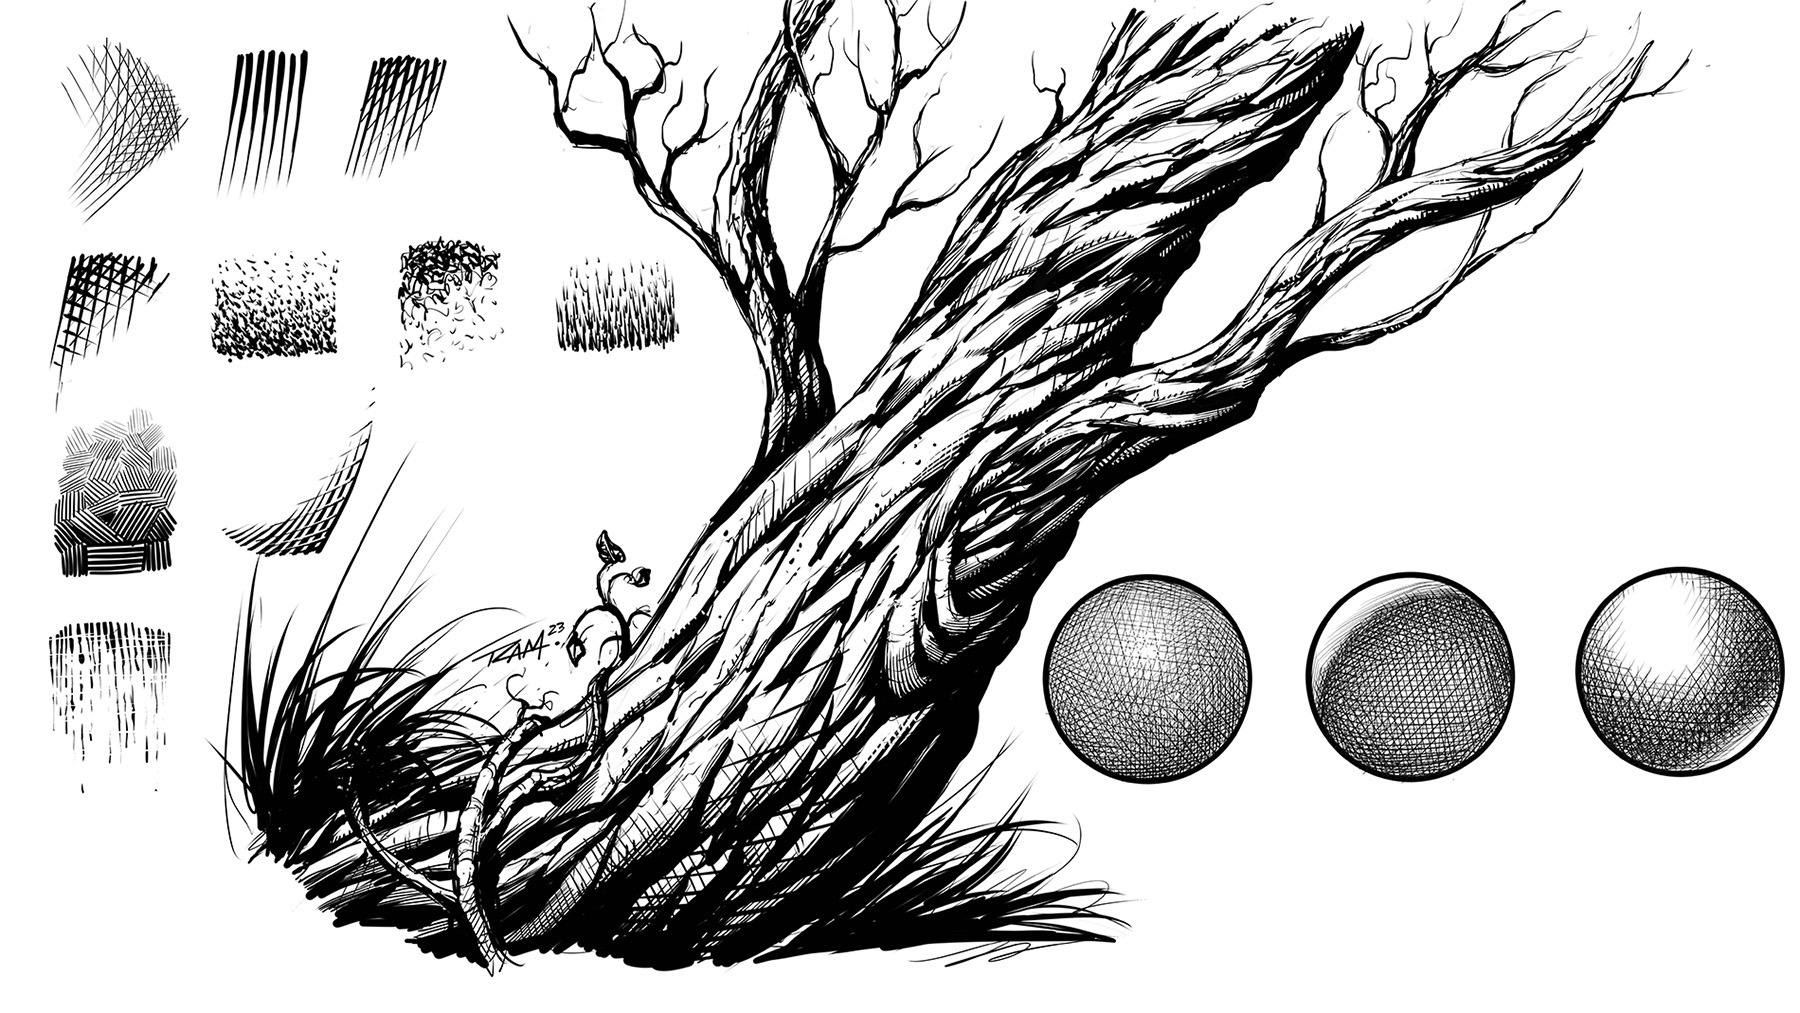
Whether you are making a hyperrealistic hatching drawing or a simple flower hatching drawing, the technique can be extremely transformative. Let’s take a look at some of the most basic and popular techniques along with hatching drawing images. You may use a single technique on your project. However, we advise you to switch between these techniques to draw varying elements in your composition.
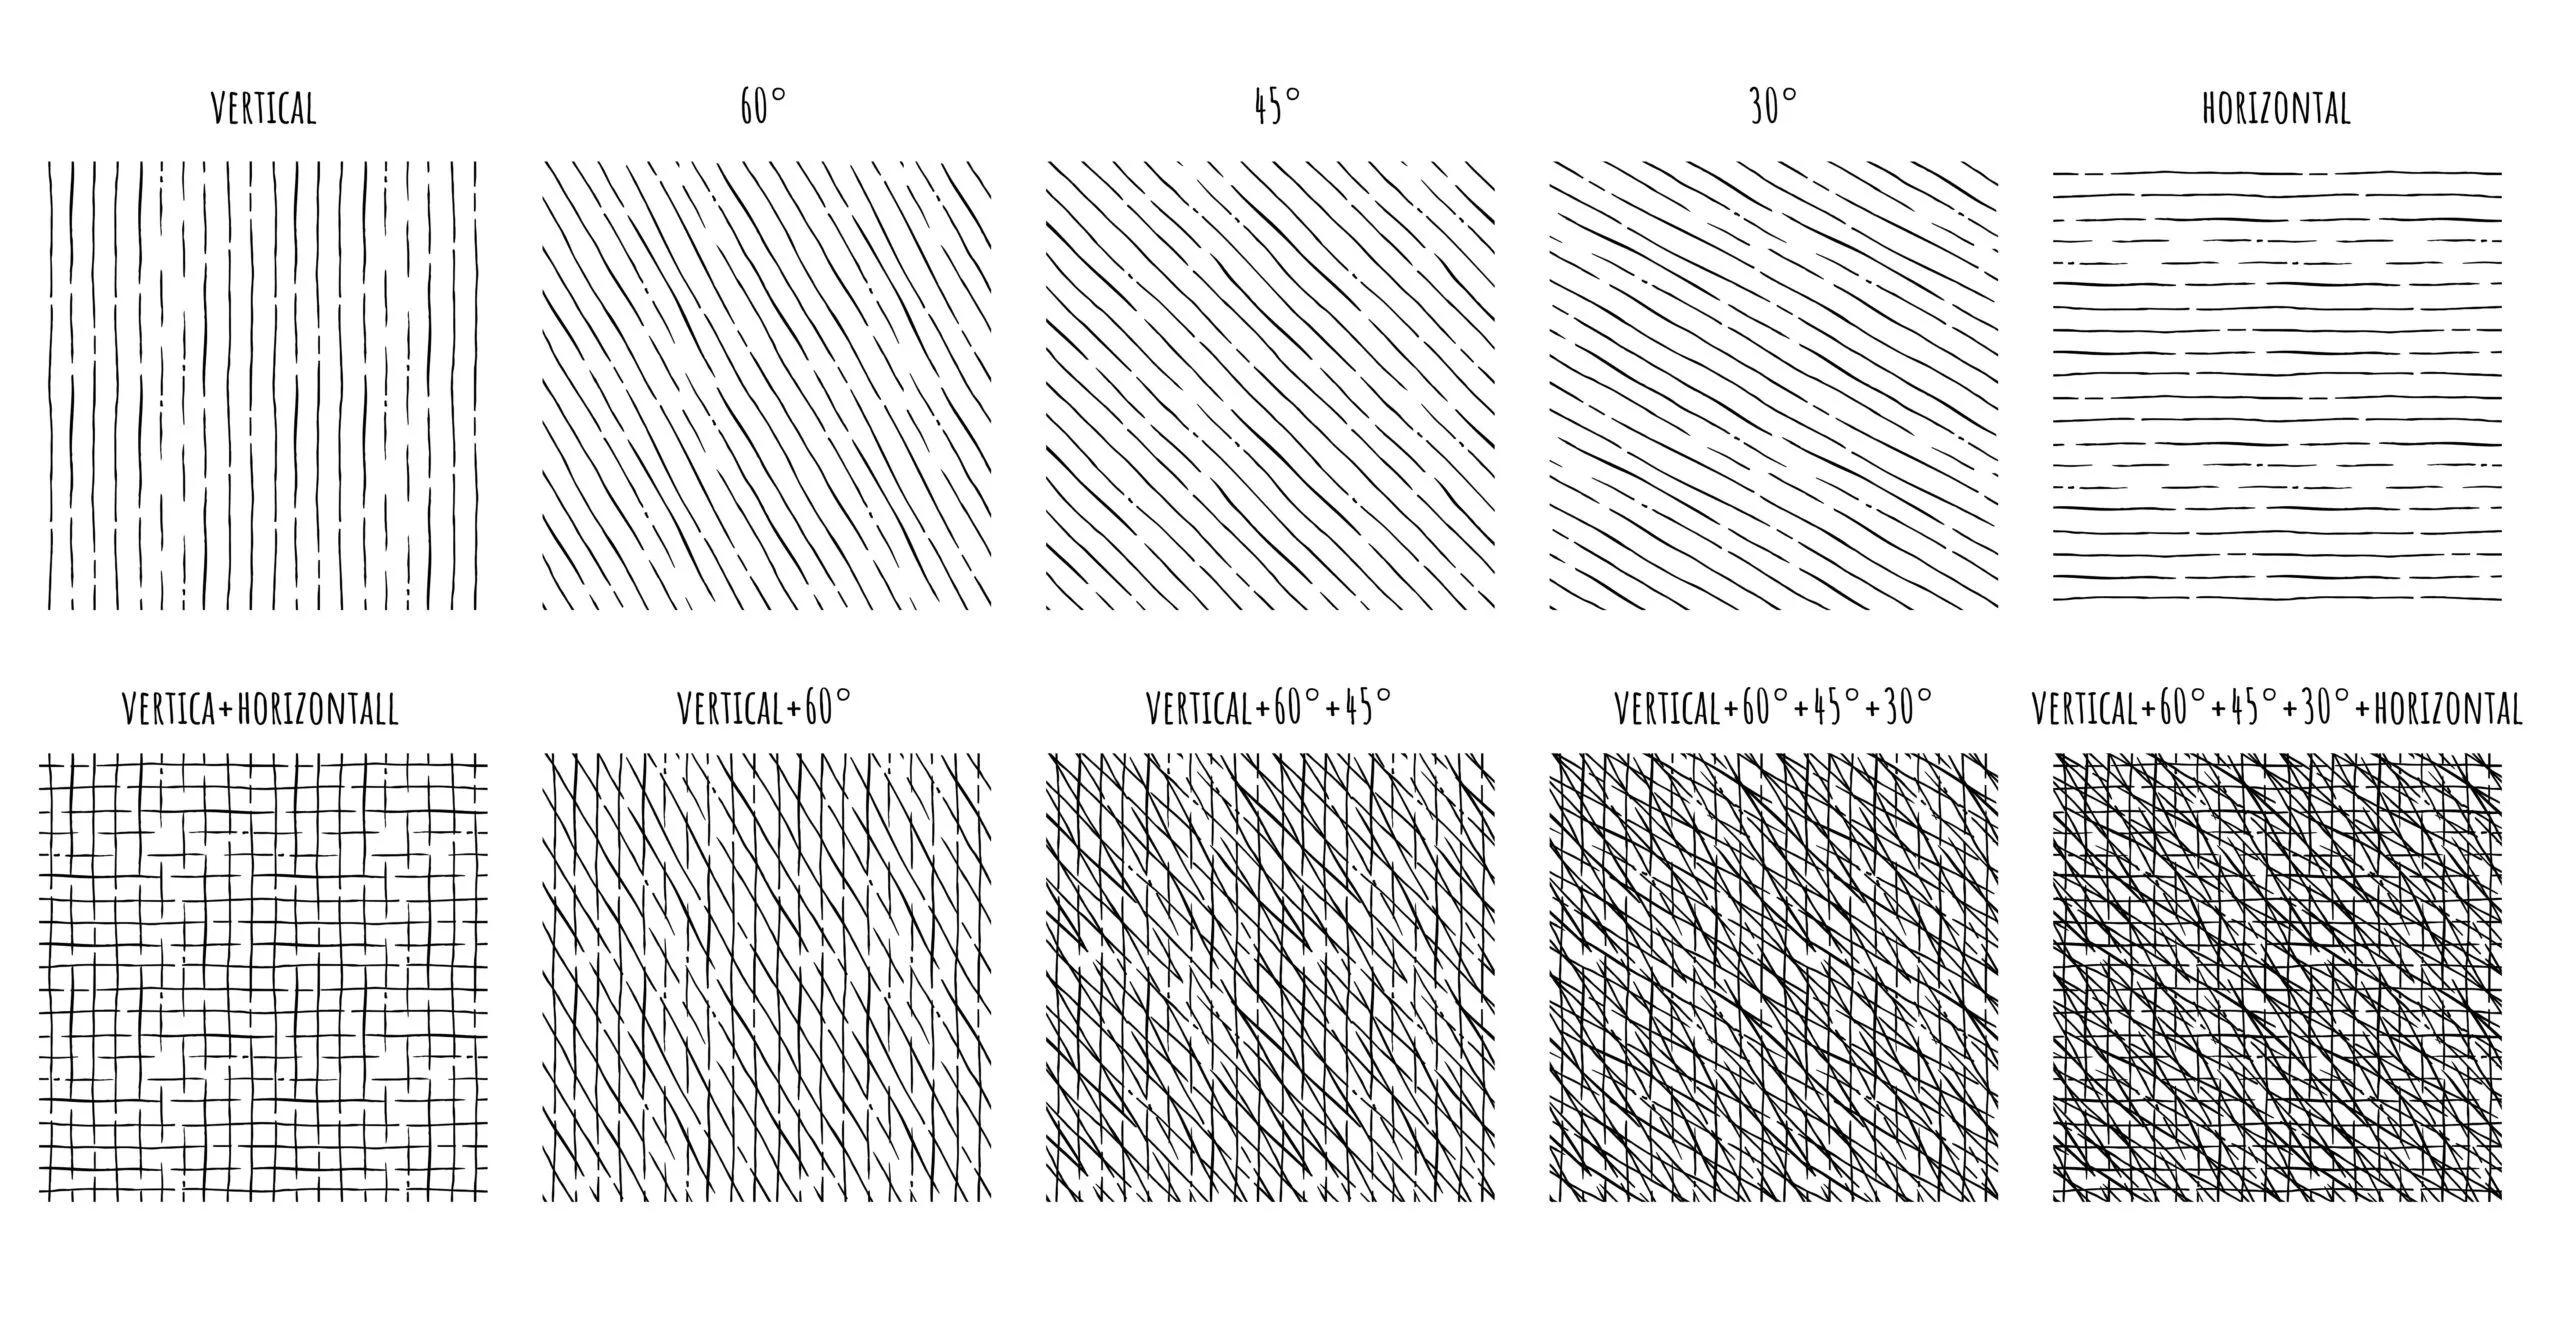
1. Linear/Parallel Hatching Drawing
In this method, the lines are parallel to each other and run along the same direction of the plane. By adjusting the distance, you can increase or decrease the darkness.
2. Cross Hatching Drawing
An easy cross hatching drawing pattern involves the pencil strokes crossing each other. They can intersect each other at any angle. Contrary to popular belief, cross hatching drawing may use multiple hatching drawing patterns, not just two.

3. Contoured Hatching Drawing
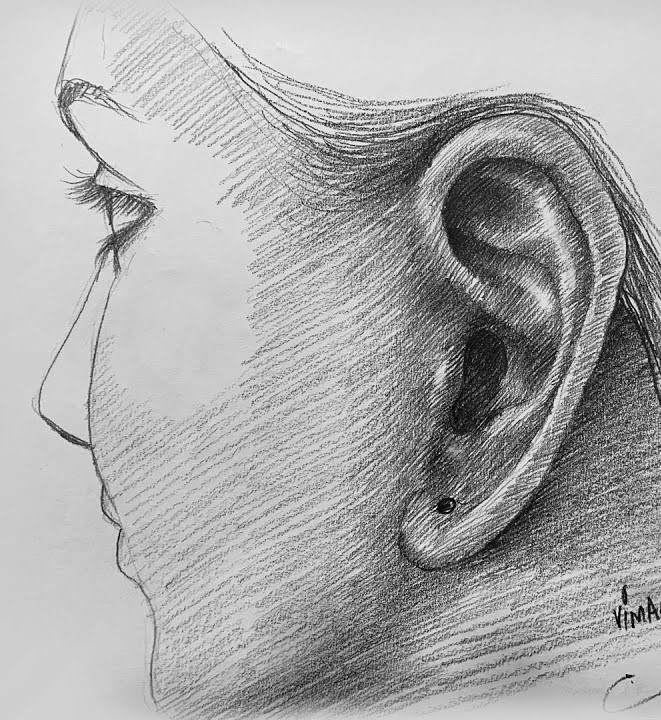
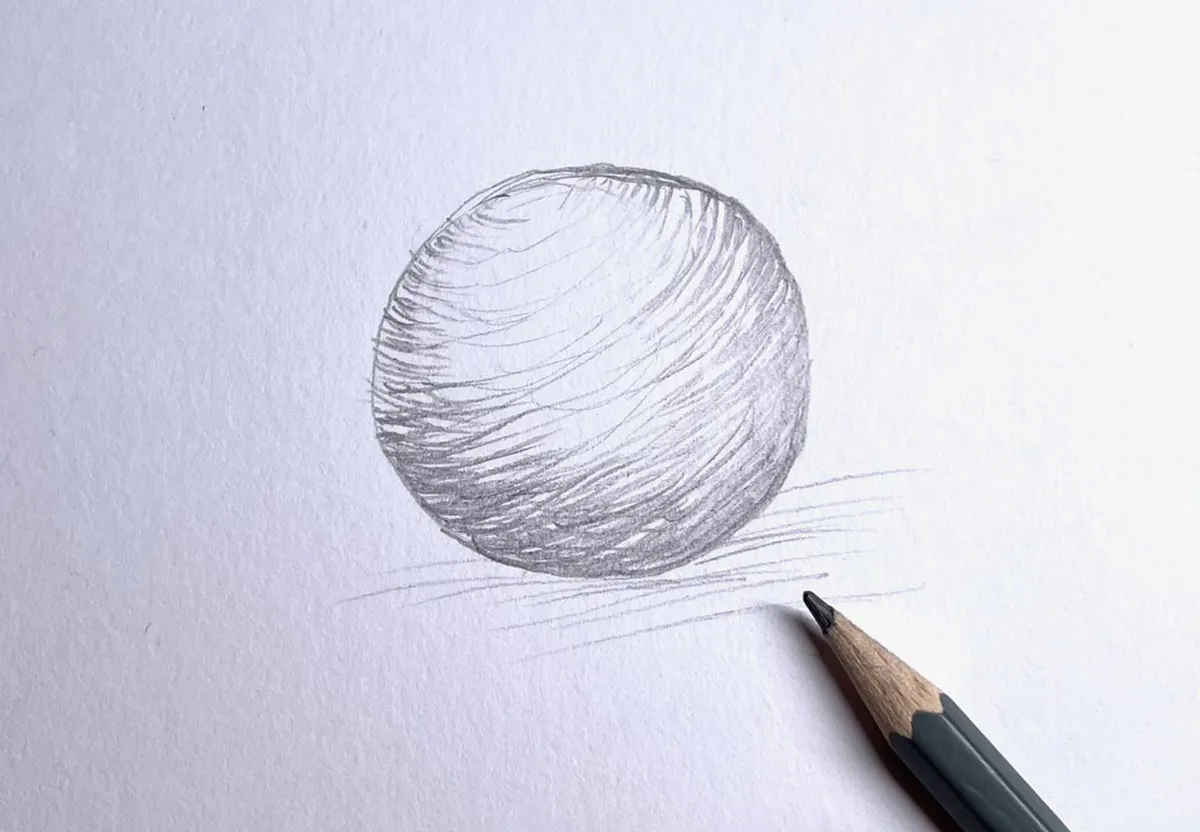
A contoured hatching drawing plays with light and shadow to define the contours of the form. It employs curved lines, made following the subject’s natural curves. Hence, the lines will fan out from a particular point. This approach enhances the three-dimensionality of a 2-D subject.
4. Basket/Woven/Patch Hatching Drawing
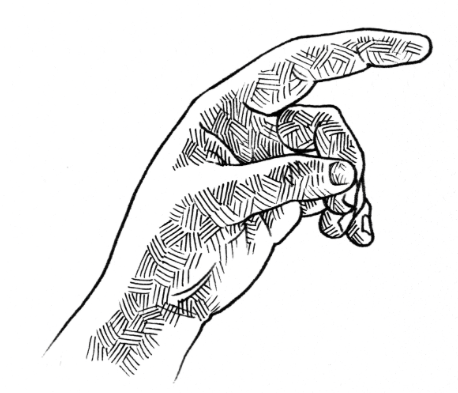
While not officially called basket or woven, this hatching drawing technique uses short cross hatching drawing lines at an almost perpendicular angle. It is reminiscent of graphic art.
5. Tick Hatching Drawing
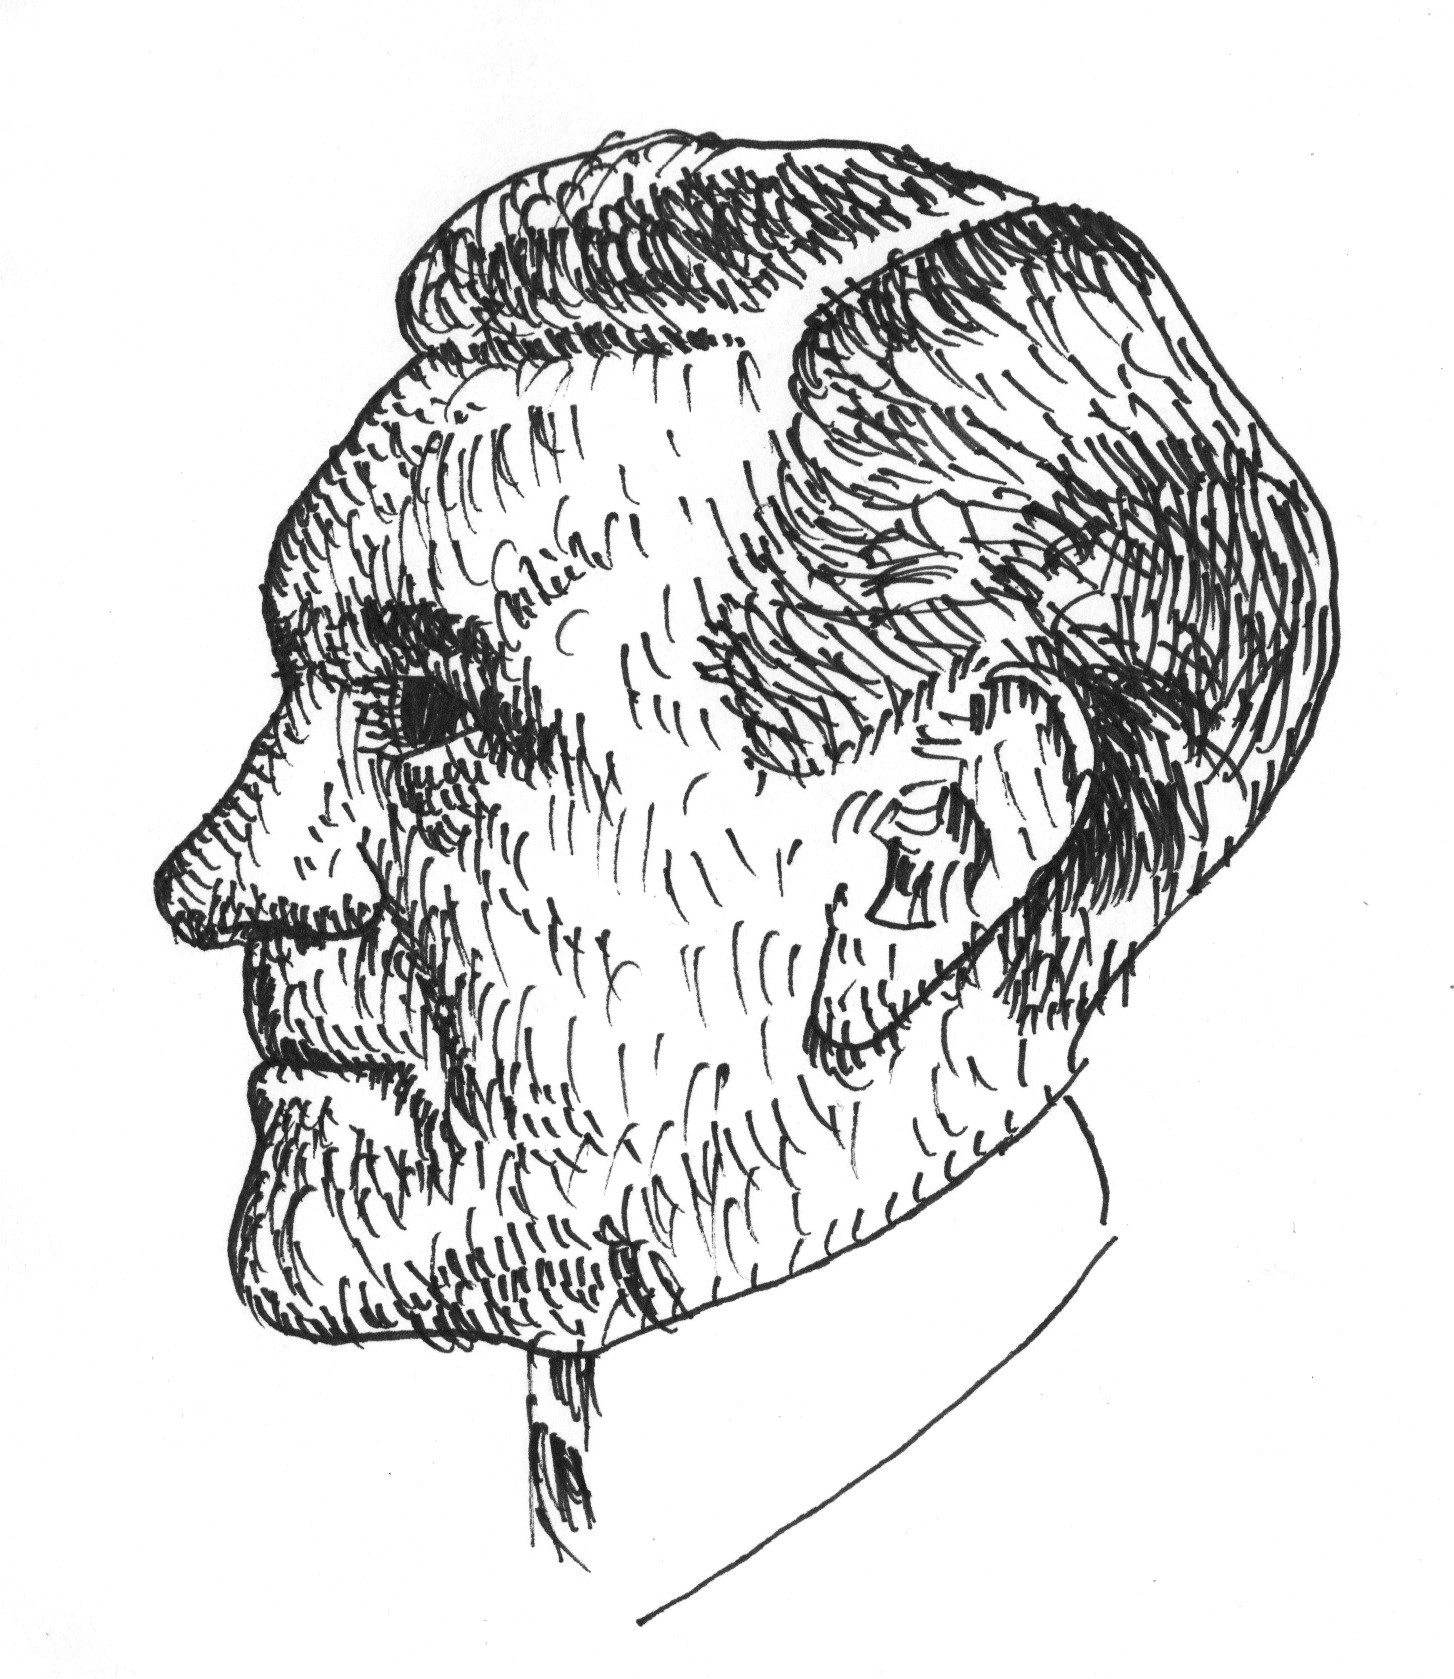
Tick hatching is a hatching drawing approach which uses small lines or ticks. Due to their length, you can easily increase their density, adding to the value of the composition. We recommend you use a pen with a thicker tip.
6. Scribble Hatching Drawing
As the name suggests, you need to scribble for this hatching drawing technique. For this approach, you need not lift your pencil from the paper. You can darken the area by squiggling it times and again.
Tips to Keep Hatching Drawing Easy
While it may sound easy, hatching drawing techniques require discipline. Hence, there are some do’s and dont’s when it comes to applying the theory to practice. Let’s discuss some of them to keep your hatching drawing easy.
- Be gentle with the pencil when you hatch to alleviate any paper scars. If not, when you rub it, unwanted white strokes will appear.
- Use a softer grade (B) graphite pencils.
- You do not need to smudge or use a blending stump on your easy cross hatching drawing pattern.
- If you are using a pen, it’s advised to create a rough draft with a pencil.
Image Courtesy – Fine Art Tutorials


